So now that I've acquired some measure of skill in both pies and bread, it is time to commence work on the unholy bastard spawn of both foods!
First attempt:
I proofed the yeast (which had been given to me by a fried who said it was possibly dead after not being properly refrigerated) with a half cup of the water and the malt, cut the shortening (which was slightly more than a cup) through the flour, added the rest of the fluid, and mixed until it was doughy/stretchy. That rose, then I rolled it out flat, poured on some thick smoothie like substance (some apples and strawberries, that had been sitting in a plastic tub in my fridge for a while and were promptly blended last night), and rolled it like what I assume a jelly roll would be like. This rose again in bread pan, and was then baked for about an hour.
I really should have split the dough into two batches and made two loaves, but oh well. It didn't bake through because it was so dense and I didn't let it rise very long in the bread pan. However, I sliced the under done loaf this morning after it had sat/set overnight, then baked them again for curious results. Kind of a dense, slightly chewy fruity thing, which retained enough of the crumbly texture I was going for.
Not a perfect success, but a good first step on my mad adventure. Would make excellent french toast.
Tuesday, June 10, 2008


Tuesday, June 3, 2008
Experimental Bean Bread
I've just tried to come up with a decent bean bread recipe, I'm not sure how it's going to turn out, but here's the recipe (reimagined after having made it up while making it) that I used:
Proof the yeast with the molasses and a quarter cup of the water. While that's doing it's thing, drain and rinse the beans, then put them in a blender with the rest of the water (I only put them in with one cup, but I think using all of it would give better blending). Put the flour in a bowl and make a well in the middle, then when the yeast is done, pour the liquified beans in the bowl along with the yeast. Mix and knead, rise twice, shape, rise if applicable, and bake.
Will update when done!
Bread has good texture, no particular black bean taste. If you want a curiously coloured bread with some protein, this recipe works, but I think I'll try using a cup less water and three cups less flour as a starting point (my initial plan, before I decided to add a cup of water to help blend the beans after I'd already mixed the water and yeast with the flour) and see if that gives more black bean flavour.
Proof the yeast with the molasses and a quarter cup of the water. While that's doing it's thing, drain and rinse the beans, then put them in a blender with the rest of the water (I only put them in with one cup, but I think using all of it would give better blending). Put the flour in a bowl and make a well in the middle, then when the yeast is done, pour the liquified beans in the bowl along with the yeast. Mix and knead, rise twice, shape, rise if applicable, and bake.
Bread has good texture, no particular black bean taste. If you want a curiously coloured bread with some protein, this recipe works, but I think I'll try using a cup less water and three cups less flour as a starting point (my initial plan, before I decided to add a cup of water to help blend the beans after I'd already mixed the water and yeast with the flour) and see if that gives more black bean flavour.
Monday, May 26, 2008
Special Summertime Beverage Edition!
This has kind of turned into a place to post things for people to use as well as a place for me to record my notes, so, in that spirit, here is a specialtime-summerdrink edition! I posted this on some forums a few years ago, and it initially came from a little (jalapeno) recipe book my mom bought my brother. I make this every summer and love it dearly
Stir and test it maybe every hour or two after the peppers have gone in to gauge it. If making it for a barbecue when you think it'll all be consumed in one day, feel free to leave the chunks in. Remember to sip the drink, don't gulp. Mixes well with gin, if that's your thing.
Stir and test it maybe every hour or two after the peppers have gone in to gauge it. If making it for a barbecue when you think it'll all be consumed in one day, feel free to leave the chunks in. Remember to sip the drink, don't gulp. Mixes well with gin, if that's your thing.
Wednesday, May 14, 2008
Honey Apple Revisited
Anton had us over for steaks he bought on discount last night, so I figured I could contribute to the meal with PIE.
Assessing my assets, I figured honey apple would be the way to go. This involved maybe four smallish apples and three largish apples, peeled and sliced on my handy peeler/corer/slicer machine, tossed around with the juice of one lemon and maybe just over a cup of honey (all that I had left). This sat for a while, until I strained and reduced the juices, then re-assembled the apples and syrup in the pie crusts.
Now, since honey was going to be a more dominant flavour, I didn't want to heavily spice it with any of the regular apple pie things that might conflict with it. So, thinking honey, I went for a whole wheat and almond crust! The crust was (for two two-crust pies) two cups whole wheat flour, one and a half cups white flour, and one cup fresh ground almonds (topped up with walnuts to make it a full cup), with 500 mL of shortening, two tablespoons cider vinegar, seven tablespoons apple cider, seven tablespoons cold water. The water was a bit too much, as it was measured for flour, not nuts, but the blend did a nice job of letting you taste the nuts in the crust this time. I was pleased.
It was a big hit, we actually ended up eating two pies between four people. Also I managed to create a rig that lets me carry two pies on the back of my bike!
Assessing my assets, I figured honey apple would be the way to go. This involved maybe four smallish apples and three largish apples, peeled and sliced on my handy peeler/corer/slicer machine, tossed around with the juice of one lemon and maybe just over a cup of honey (all that I had left). This sat for a while, until I strained and reduced the juices, then re-assembled the apples and syrup in the pie crusts.
Now, since honey was going to be a more dominant flavour, I didn't want to heavily spice it with any of the regular apple pie things that might conflict with it. So, thinking honey, I went for a whole wheat and almond crust! The crust was (for two two-crust pies) two cups whole wheat flour, one and a half cups white flour, and one cup fresh ground almonds (topped up with walnuts to make it a full cup), with 500 mL of shortening, two tablespoons cider vinegar, seven tablespoons apple cider, seven tablespoons cold water. The water was a bit too much, as it was measured for flour, not nuts, but the blend did a nice job of letting you taste the nuts in the crust this time. I was pleased.
It was a big hit, we actually ended up eating two pies between four people. Also I managed to create a rig that lets me carry two pies on the back of my bike!
Sunday, May 11, 2008
Apple-mango update
I've just made the third incarnation of the apple-mango pie, and I think I like the filling the best this way. There were two smaller, softish apples and one larger, firmer one, chopped up and tossed with lemon juice. For reasons still not entirely clear to me, I blended yesterpie's leftover apple slices, which had gone brown in the fridge, with some cider and zapped it into sauce. Then I cooked it until it was a nice, thick apple sauce. I don't know why I did this, it just sort of happened.
I used a few tablespoons of that as fluid when blending the chopped mango later. It didn't get as much of a smoothie texture as when I blended mango with cider, but I didn't want it to get too wet. So, the blended mango/apple sauce then went into the frying pan with the apples (which went on while the sauce was cooking), got tossed around and cooked as I rolled the crusts, then went into the shell and baked until the crust was done.
It gave a nice soft fruit filling throughout, which wasn't what I was going for, but I think I actually like it more than an apple pie with chunks of mango. This may make a really good turnover filling. I might grind some nuts and use those to make a little firmer still, but I'm not sure which would be best.
I used a few tablespoons of that as fluid when blending the chopped mango later. It didn't get as much of a smoothie texture as when I blended mango with cider, but I didn't want it to get too wet. So, the blended mango/apple sauce then went into the frying pan with the apples (which went on while the sauce was cooking), got tossed around and cooked as I rolled the crusts, then went into the shell and baked until the crust was done.
It gave a nice soft fruit filling throughout, which wasn't what I was going for, but I think I actually like it more than an apple pie with chunks of mango. This may make a really good turnover filling. I might grind some nuts and use those to make a little firmer still, but I'm not sure which would be best.
Wednesday, May 7, 2008
Pita Bread!
I really actually wanted to write my bastard samosa/fatayers down here before doing something else, but pitas are fresh on my mind so I'll write them down now. The recipe I worked with came from the same book as the first bread I posted, The Laurel's Kitchen Bread Book.
NEED:
Dissolve the yeast in the warm water, let it wake up. Duh. Mix the flours and salt together, make a well in the center, pour in the water and yeast and water, mix, then knead well. I went for a full twenty minutes (two brief breaks), to make sure it was well kneaded, as the gluten is essential to the pocketing. I may try doing it next time for only five to ten minutes to see if laziness is OK, but I don't mind kneading, and my soup was simmering so I had to stay near the kitchen but had nothing to do.
This dough should be fairly soft and be just not sticky. Work in more flour if you think it needs it.
Form the dough into a ball, and let rise for about an hour and a half, until doubled, in a warm, draft free place. It is more important here than with regular bread that the dough does not dry out, as steam, instead of yeast or baking soda, is the workhorse in rising this stuff. The yeast gives it texture and some flavour, but the rising is steam-powered.
Punch it down, let it double again (about half an hour to thirty minutes), then flatten it and divide into twenty to twenty-four even pieces, and smooth those into rounds. Set them aside to rest for ten minutes again, well covered and draft-protected, or you'll get no pocket. Start the oven to 450º F and put your baking stone on the second lowest rack.
Once they're rested, roll out four, keeping the rest covered, then toss them on the stone quickly, trying to make sure they don't fold over on themselves. You'll probably need a lot of flour as you're rolling these because it should be a fairly moist dough still.
Start rolling the next batch of pitas, making sure to check on the ones in the oven after three minutes. If all has gone well, they should puff up like delicious bread balloons. Take them out when they look done; a little browning is OK, but if they get crispy, well, they get crispy and that's not useful as a pocket bread. I'd of taken a picture at this stage because they looked really cool, but I was too busy dealing with the smoke detector because somebody used my baking stone to roast red peppers and it still gets smoky from the juice burning on...
Anyways, these turned out wonderfully on the first go! I was out of whole wheat flour, which is why I used rye (original recipe called for six cups whole wheat bread flour). Bread flour is important here, as the pocket is created when the steam trapped on the inside of the stretchy gluten dough is trapped and pushes the two sides apart. Maybe I'll try an all-purpose flour batch with lazy kneading to see how necessary all of that really is, but I would not risk cutting corners if I was cooking them for something.
The finished pitas were definitely a little floury from all the flouring I did to roll the sticky dough, so I think next time I'll dusting them with corn meal instead. And make corn flour pitas as well!
If you're anything like me, you're going to want to tear one of the first ones open to see if it's done, so, if you do, be warned, these things have swollen like balloons because of steam, meaning there is a lot of hot, pressurized steam inside of them. Keep this in mind when using your hands/looking closely. Don't burn yourself on hot steam. That's really lame.
I can't wait to make a good salad thing to stuff these with!
NEED:
Dissolve the yeast in the warm water, let it wake up. Duh. Mix the flours and salt together, make a well in the center, pour in the water and yeast and water, mix, then knead well. I went for a full twenty minutes (two brief breaks), to make sure it was well kneaded, as the gluten is essential to the pocketing. I may try doing it next time for only five to ten minutes to see if laziness is OK, but I don't mind kneading, and my soup was simmering so I had to stay near the kitchen but had nothing to do.
This dough should be fairly soft and be just not sticky. Work in more flour if you think it needs it.
Form the dough into a ball, and let rise for about an hour and a half, until doubled, in a warm, draft free place. It is more important here than with regular bread that the dough does not dry out, as steam, instead of yeast or baking soda, is the workhorse in rising this stuff. The yeast gives it texture and some flavour, but the rising is steam-powered.
Punch it down, let it double again (about half an hour to thirty minutes), then flatten it and divide into twenty to twenty-four even pieces, and smooth those into rounds. Set them aside to rest for ten minutes again, well covered and draft-protected, or you'll get no pocket. Start the oven to 450º F and put your baking stone on the second lowest rack.
Once they're rested, roll out four, keeping the rest covered, then toss them on the stone quickly, trying to make sure they don't fold over on themselves. You'll probably need a lot of flour as you're rolling these because it should be a fairly moist dough still.
Start rolling the next batch of pitas, making sure to check on the ones in the oven after three minutes. If all has gone well, they should puff up like delicious bread balloons. Take them out when they look done; a little browning is OK, but if they get crispy, well, they get crispy and that's not useful as a pocket bread. I'd of taken a picture at this stage because they looked really cool, but I was too busy dealing with the smoke detector because somebody used my baking stone to roast red peppers and it still gets smoky from the juice burning on...
Anyways, these turned out wonderfully on the first go! I was out of whole wheat flour, which is why I used rye (original recipe called for six cups whole wheat bread flour). Bread flour is important here, as the pocket is created when the steam trapped on the inside of the stretchy gluten dough is trapped and pushes the two sides apart. Maybe I'll try an all-purpose flour batch with lazy kneading to see how necessary all of that really is, but I would not risk cutting corners if I was cooking them for something.
The finished pitas were definitely a little floury from all the flouring I did to roll the sticky dough, so I think next time I'll dusting them with corn meal instead. And make corn flour pitas as well!
If you're anything like me, you're going to want to tear one of the first ones open to see if it's done, so, if you do, be warned, these things have swollen like balloons because of steam, meaning there is a lot of hot, pressurized steam inside of them. Keep this in mind when using your hands/looking closely. Don't burn yourself on hot steam. That's really lame.
I can't wait to make a good salad thing to stuff these with!
Sunday, May 4, 2008
Potluck Part 1: Strawberry Lime!
A week ago we hosted a vegan potluck at my place, which went fairly well. For it I baked a pizza, made an attempt at fatayers which ended up more like samosas, and constructed two strawberry-lime pies.
The pies turned out too tart because I didn't add enough sugar (I actually forgot to buy white sugar and didn't want the flavour of brown sugar mucking around in there), but they were tasty nonetheless.
For two pies, you need:
Throw five cups of the sliced strawberries in a pot with the lime juice, and simmer, mixing occasionally, until you're getting a thicker sort of thing. I'm going to just go ahead and guess that this took about half an hour. Mix the cornstarch in the water well (no lumps!), then add to the simmering strawberries. Add the sugar as well, and whisk that pot all together, and keep on simmering until it's thickened a bit more.
While that's thickening, place the remaining four cups of sliced strawberries in the two baked pie crusts. Once it's done, pour the filling on top of the sliced strawberries, then arrange the layered strawberries on top. Cover and refrigerate until set, ideally at least two hours.


Bigger pictures if you click the images, because strawberries look awesome.
Man, that was a lot of strawberries. All those measurements are measurements after being cut, so I don't even want to guess what the volume would have been before chopping them up.
The filling came out a little too thin/runny, so I think a little more cornstarch might be in order next time. Perhaps less lime juice as well; one cup should have been fine.
I didn't add any sugar to the filling when I made it, so I ran to the store and gave a serious sprinkling of sugar to the filling before laying the halved strawberries down, leaving one pie okay and one still just too tart. A quarter cup is a guess at what would be appropriate based on how much I used and how they came out.
When cutting the strawberries, try and save the nice, regular ones for the top of the pie.
The pies turned out too tart because I didn't add enough sugar (I actually forgot to buy white sugar and didn't want the flavour of brown sugar mucking around in there), but they were tasty nonetheless.
For two pies, you need:
Throw five cups of the sliced strawberries in a pot with the lime juice, and simmer, mixing occasionally, until you're getting a thicker sort of thing. I'm going to just go ahead and guess that this took about half an hour. Mix the cornstarch in the water well (no lumps!), then add to the simmering strawberries. Add the sugar as well, and whisk that pot all together, and keep on simmering until it's thickened a bit more.
While that's thickening, place the remaining four cups of sliced strawberries in the two baked pie crusts. Once it's done, pour the filling on top of the sliced strawberries, then arrange the layered strawberries on top. Cover and refrigerate until set, ideally at least two hours.
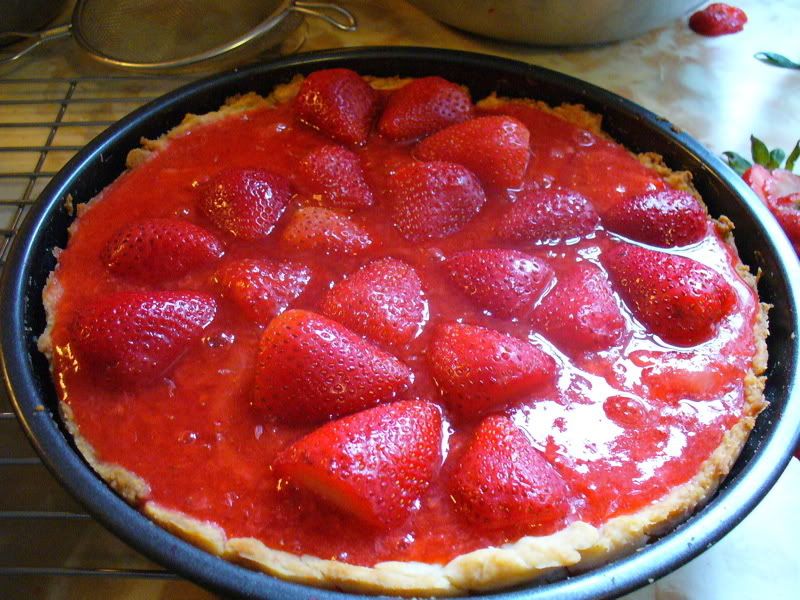
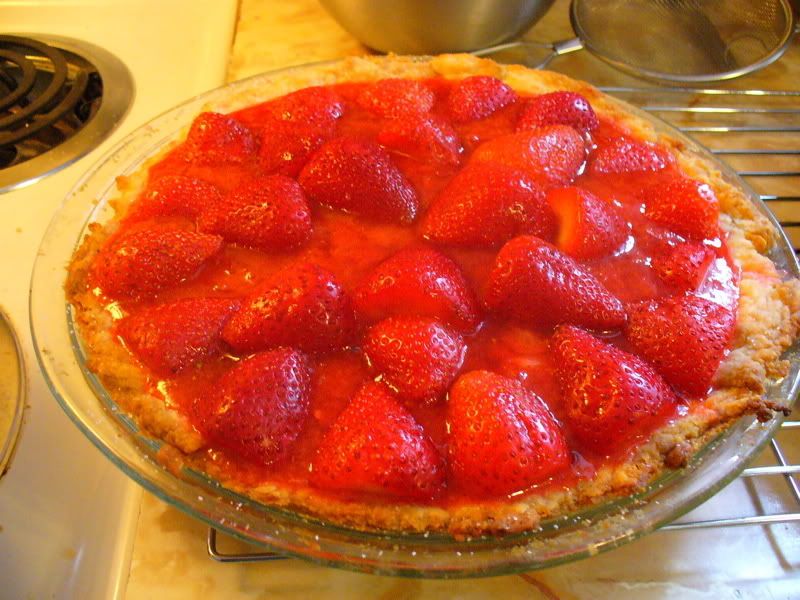
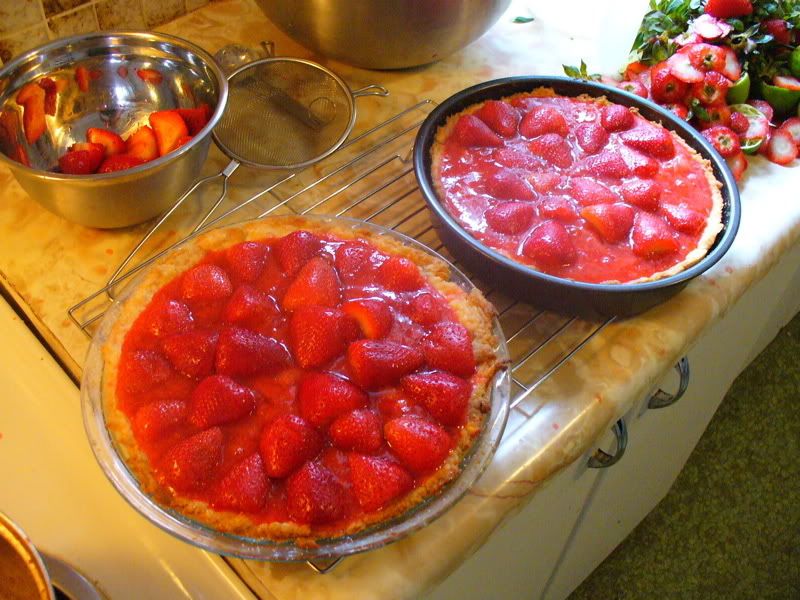
Bigger pictures if you click the images, because strawberries look awesome.
Man, that was a lot of strawberries. All those measurements are measurements after being cut, so I don't even want to guess what the volume would have been before chopping them up.

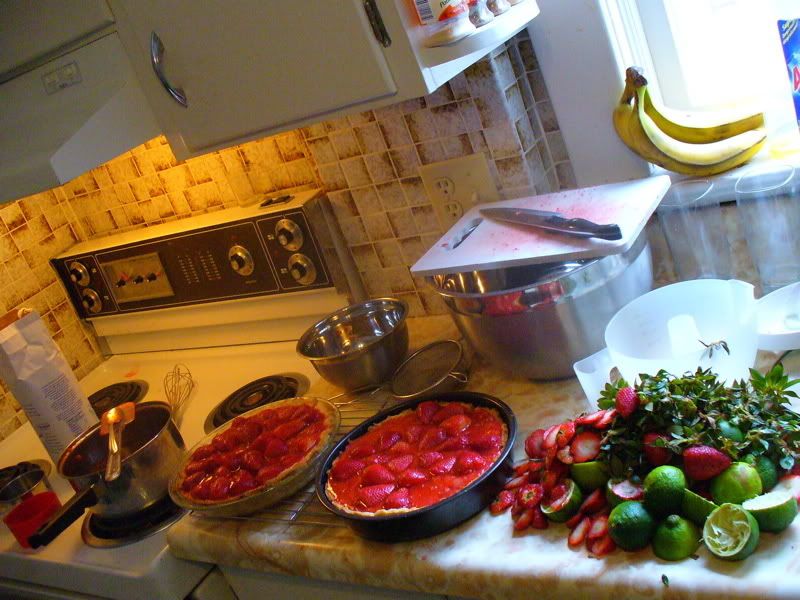
The filling came out a little too thin/runny, so I think a little more cornstarch might be in order next time. Perhaps less lime juice as well; one cup should have been fine.
I didn't add any sugar to the filling when I made it, so I ran to the store and gave a serious sprinkling of sugar to the filling before laying the halved strawberries down, leaving one pie okay and one still just too tart. A quarter cup is a guess at what would be appropriate based on how much I used and how they came out.
When cutting the strawberries, try and save the nice, regular ones for the top of the pie.
Subscribe to:
Posts (Atom)