I don't know if anyone else has noticed this weird thing the bulk barn has that's labeled 'almond paste', which appears to be some sort of cheap approximation to marzipan. It is yellower than marzipan, it handles a little stickier, and I think they might of even slipped some vanilla in there to make up for its deficiencies in the almond department. Anyways, it's about a bajillion times cheaper than actual marzipan and given my love of marzipan yet limited budget, I like to pick some of the stuff up when it's on sale (which is always, for some strange reason).
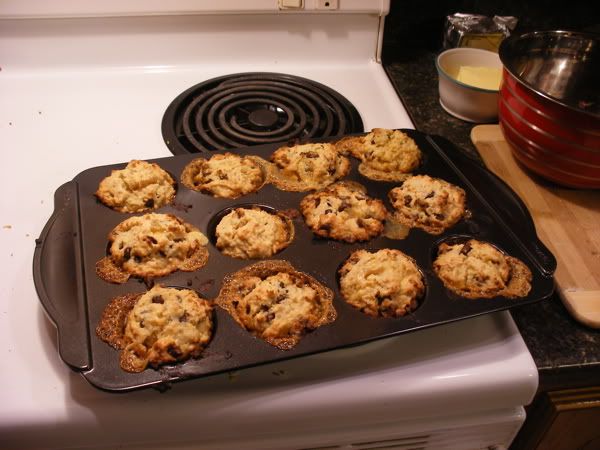
I'm almost out of muffins again, so it's muffin time again (again!). I think I might be going a little nuts on muffins, this'll probably be the last time for a while that I make them. Basically I'm just doing chocolate chip muffins plus chopped up almond paste, with honey for to go with the almond with. OK that last sentence had something weird going on but I like the way it sounds if I say it, so redundant words remain.I started by setting the oven to 350ºF and using the heat from the oven exhaust to melt the butter, then I combined the flour, wheat germ, salt, and baking powder. The almond paste was chopped up to bits about the size of the chocolate chips and then added, with the chocolate chips, to the flour bowl.
The butter was melted by now, so that hit the milk and the honey and the vanilla, got mixed, and then the eggs joined the party and got beaten up.
Everybody together now! Mix just until combined! Put it in a muffin tin, let it go, 18 minutes hey-ho!
They came out pretty tasty, but way too sweet for my everyday breakfast muffins. That almond paste stuff is pretty sweet. They are too heavy to be cupcakes, but they seem pretty cupcakey, what with the vanilla, the almond, and the sweetness. Perhaps the honey could be halved next time. ALSO! If I do this again, I will use little paper cupcake liners, because the almondzipaste baked and bubbled and gummed everything up pretty good.
Not what was I going for, I guess I'll have eggs for breakfast tomorrow or something. Still pretty tasty!
I guess the room for pondering here would be in what flour variations would work. I think barley could work but I always think barley could work. The only non-wheats I have on hand right now are rye and buckwheat, though, which I don't think would work.
Thursday, January 28, 2010
Tuesday, January 26, 2010
Baked Egg Update
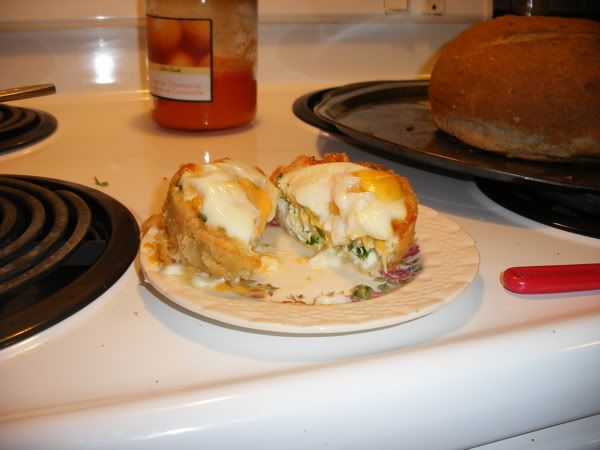
Baked eggs in pastry again, this time with chopped fresh spinach and grated cheddar. Baked only 25 minutes this time, got semi soft but I think there will always be a problem getting these things to have soft yolk but cooked whites when it's two eggs in one ramekin. When I finally have a reason to do a dozen I'll post the times from that.
Spinach and cheddar and eggs are a solid combo.
Sunday, January 24, 2010
Plantain Chocolate-Chip Muffins
So I'm a muffin addict and I've been using up some plantains I bought, so here are plantain & chocolate chip muffins.Take your plantain, chop it up, and toss it with the sugar to soften. If you're on top of the game, do this a half hour or more before you start the rest of the stuff so they have time to soften in the sugar. Start by mixing your dry ingredients together in a bowl, then put the butter, milk, and plantain in a food processor or blender and zap it up smooth. Mix the eggs in with the wet stuff (pulse quickly or just mix in with a spoon), then dump the wet stuff in with the dry stuff, and mix just until combined. Portion out into a greased muffin tin, makes 12 muffins. Bake fifteen minutes or so at 350ºF or until a knife/toothpick comes out clean when inserted in the center of a muffin.
Friday, January 22, 2010
Honey Cookies
Honey is pretty awesome. I don't know if it has any health benefits, and I'm purposefully not looking it up because I want to maintain my delusions that it somehow makes me well to eat lots of honey. I mean, it's a natural organic local product, right, it's got to be good for me?
Anyways, I made some honey cookies because I wanted to make some tasty cookies. Here goes!Cream the butter and shortening together, then beat in the honey and eggs. When that's good and mixed, add the flour, wheat germ, and baking powder. Mix until you've got a good cookie dough, then form them into balls on the size of two tablespoons, dip in the chopped nuts or chocolate chips, and bake at 350ºF for 9 minutes. If you want smaller cookies, make 'em smaller and cook a minute or two less. I like big cookies.
I also forced myself to make cookies without chocolate chips in them but decided to top the last batch with chocolate chips anyways because I am a fiend for chocolate chips.
P.S. Serve with black coffee! They are pretty sweet and simple in flavours but pair well with strong simple flavours like espresso.
Thursday, January 21, 2010
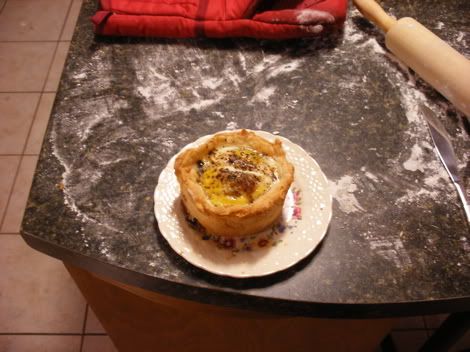
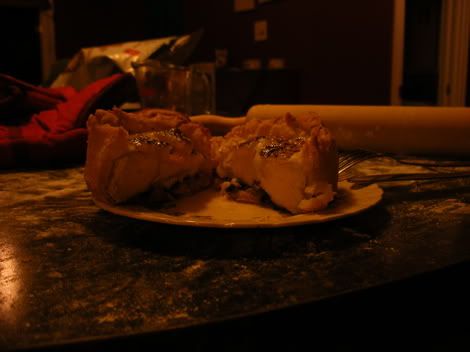
Baked Eggs
I was thinking about cute breakfast foods the other day and thought that baked eggs with pastry might be a cool thing to make. Ideally, I'd like to make a dozen baked eggs in a muffin tin, but whereas I do not have a dozen eggs worth of egg-eating people around, I've just done two eggs in a ramekin instead. The recipe is actually set for four of these things, but you can always make as many as you actually want and leave the leftover pastry for scraps for later, or even use them to make a sweet breakfast pastry for after the eggs. I've added in some fried mushrooms, onions, and garlic because I'm eating it for supper, but you can augment these with whatever you might put in an omelette (cheese, chives, roasted red pepper, whatever).
Anyways, TO MAKE:
-mix one cup pastry flour with a dash of baking powder and a dash of salt
-cube one half cup butter, then cut it through the flour
-sprinkle three tablespoons water on a little at a time, mixing gently
-turn onto a floured work surface and work slightly until it is just cohesive
-cut into quarters, place in fridge
-fry up half a portabello, two cloves garlic, and half an onion, all minced
-remove pastry from fridge, roll the quarters into circles, then place them in greased ramekins
-portion the fried business into the ramekins, then crack two eggs per ramekin on top, and season with salt and pepper
-bake at 350ºF for half an hour
I've seen another recipe online that calls for putting in one egg, then the bits and bobs, then the other egg, and that gives a cool effect too, but I just prefer the bits on the bottom of the egg.
Also, I like my yolk hard, so take a few minutes (five or so) off the bake time for runny yellows.
Also, in retrospect, the pastry might still be OK with only a third of a cup or butter. Having an eighth of a cup of butter per serving can't be a good idea.
Monday, January 18, 2010
Plantain Pie!
My objective is to be updating this blog every other day now. I didn't keep up while I was away this past half-week, but I've got two things to type up that I baked but didn't blog while living with the vegan kitchener crew.
Keeping up with regular posts means some of these posts will be cool, some will be 'hey bake this in pastry scraps', and some will be 'so this didn't work, but I think I can fix it'. This plantain thing is a bit of all three.
Peel and slice two plantains and toss them in a bowl with one quarter cup sugar and one tablespoon ginger. Cover and set aside.
If you're making fresh pastry, make enough for a two crust pie or so, and add a quarter cup cinnamon for kicks. If not, that's cool.
Say 'Plantain Pie' a couple times aloud in optional assorted accents. Southern drawl is an obvious contender but british paper-boy is also pretty good.
I think 'flat pie' is going to be a theme of mine for a little while. I rolled this out as a pastry braid again, but if you wanted to do a flat-ish pie that's cool too. I just think they're pretty fun and easier to eat. What you're going for is to be able to layer the plantain pieces two slices thick, cover in pastry, and and bake until the pastry's done and the filling is soft, about forty minutes. Before baking, though, brush the top with water and sprinkle with sugar, and maybe more cinnamon if you're feeling reckless.
It is better hot than cold but it is a passable packable lunch-time snack leftover.
Tuesday, January 12, 2010
Pastry Scraps: Cream Cheese Braid
Another pastry scrap idea, this time doable with a smaller amount of dough. This is using the scraps from the two pies from lunch today, but it's a fairly scaleable idea.
Quick and simple, I rolled the dough out into a rectangle about six or seven inches across and then as long as it would go. To form the braid, I trimmed the edges so this was a proper rectangle, then cut diagonal strips on the sides as per the following diagram:
The grey areas are to be cut off as scrap, the middle rectangle is where the filling goes, the top flap on the rectangle fold down and then all the little flaps on the side fold over the top, alternating sides. Sorry I didn't illustrate this on the picture, but you only cut off the grey areas and between the flaps on the side, the rest of the lines are just scored for reference. When you do this it should become self-evident when you're looking at it. The first time I made such a thing I did a paper cut-out first and folded it to make sure I understood what was going on.
The filling was about a quarter cup of cream cheese and two tablespoons of honey, creamed together and spread on the rectangle, plus a line of jam down the middle. Make sure to leave room around the edges as it'll spread out when you start folding!
When it's been filled and folded, back it at 350F for twenty minutes or so, or until it's done. Whereas this is a scraps project, the type of pastry you're using or the thickness of the pastry really depend on the circumstances, so just bake it till it's done.
You can glaze it with egg white and sprinkle it with sugar before you bake it, or brush it with sweet glaze when it's done, or, what I did was use up the leftover chocolate sauce from previous adventures and top it with that. Slice it into strips cross-ways (not lengthwise!) and enjoy!
Sunday, January 10, 2010
Pastry Scraps: Pears & Jam
So I've made four pies this week, which has left me with a nice pile of scraps that weren't quite enough to make a full pie, but I needed to use them up, so I've made this kind of semi-pie thing which is a pretty decent snack.
I took all my scraps, made a ball, and cut it in half, rolling each half thin until I got two pieces that'd just cover the bottom of a pie shell. I then sliced a pear, tossed the slices with three tablespoons of blackcurrant jam and two tablespoons of honey, and put the slices on one of the two pastry pieces (which was now in a pie tin). The edge of the pastry got wetted by some dabs of water, then the other crust went on top, got liberally slashed for steam vents, and it all baked at 350F for 35 minutes.
In the last ten minutes of baking, I stole my mom's idea and put a little pyrex measuring cup on the stove where the oven vents it's heat, and used that to melt some chocolate chips and butter.
When the pastry was done, I took it out, slid it onto a plate, and drizzled chocolate over top. Scrumptious and pretty low-labour for twelve o'clock at night!
Wish I had a camera...
Friday, January 8, 2010
Chocolate-Chip & Buttermilk Muffins
I am lazy. Very lazy. Especially when it comes to breakfast. Most days of the week I am just like 'ughhhh sunshine ughhhh I don't care wait what you expect me to slice bread, put it in the toaster, then spread stuff on it and get my hands sticky with jam and then crunch my way through breakfast'. Sometimes, it is fun to cook breakfast/brunch but most of the time I just do not care. That is why I bake muffins! Make a batch of one or two dozen at night, and you've got breakfast for a couple days to a week!
The requirements for these muffins was that they be fairly heavy and not too sweet, so that I can eat two or three and feel full but not bad.
Here goes!Cut up the butter and cream it with the honey, then add the butermilk and eggs and mix that together. Combine all the dry things in a bowl, form a well in the middle, then dump the wet things in and mix just until combined. Don't mix too much, but do be sure to scrape the bottom of the bowl for floury pouches.
Plop the batter into a buttered muffin tray, and bake at 350F until done. Uh, I think that's, like, twenty minutes? I just wash dishes and clean up and check the oven until they look done and a toothpick/thin knife come out clean when inserted into a muffin.
YUM.
Thursday, January 7, 2010
Apple Custard Rhubarb Pie
Here's a summer time recipe I never wrote up but quite enjoyed. I had apples and rhubarb, but didn't want to just throw them in a shell and make the same old rhubarb pie. So, I pulled up a custard recipe, blended some apples with it, then put chopped rhubarb on that and baked it. Turned out pretty much exactly as I wanted, so, from memory, more or less, here it is!
Need:3/4 cup cream 1/4 cup flour 3 eggs 4 apples 4-8 stalks rhubabr 1/2 cup sugar two pie crusts
So the pastry needs to be two half-baked pie shells. Grab any two crust pie recipe, put in two pie shells, prick each shell a half dozen times on the bottom, and bake at 400F for 20-25 minutes, until the crust is browned. Some people like to use parchment and pie weights, but I think that's unnecessary as long as you check ten minutes in to see if the bottom is swelling, and, if so, you just poke it to make it deflate, and then there's no need for parchment or weights. You can pre-bake these while prepping the filling.
Before baking the pies though, prep the fruit. Peel and core your apples, chop them up and toss them with 1/4 cup of the sugar, then chop the rhubarb and toss it with the other 1/4 cup of sugar, then set them aside (covered) to macerate. The apples need to sit for at least half an hour before you use them in the next step. Once your pie shells are in the oven, whisk well the cream, flour, and eggs. Add the chopped apples plus their juices and sugar to the custard mixture, and zap it with an immersion blender, stand blender, or food processor, whatever gets the job done. The apple should be soft by this point and should just blend away without leaving any chunks in the custard.
Now comes a quick choice for you to make. Basically, I wanted the custard to be strictly apple flavoured, butyou might like the idea of mixing the flavours. So, if you want your filling to taste of both apple and rhubarb, toss the chopped rhubarb plus it's juice into the custard mixture and pour it all into the shells. If, like me, you want segregation of you flavour states, pour the custard into the shells pour off and reserve your rhubarb juice (I made mango-rhubarb lassi with it!), and toss the rhubarb over top of the custard.
Bake in a 350F oven for 25-30 minutes, until the custard has set.
So, as this is from memory, there are caveats. I have no idea how much rhubarb I used, just use what you want and what you have on hand. I scarcely buy it and instead just get bundles of it from people who have it and have too much (rhubarb is like a weed). As well, I might have used four eggs, I might have used three. Feel free to use as many eggs as you want if you have a better idea.
It fulfilled my objectives pretty much to the letter, by having a very apply custard plus chopped rhubarb. The custard was a bit soft/watery, though, so it might be a thought to either not add the juices from the apples or to reduce that juice first. I was fine with it as it was, but you might have a different opinion after making.
Need:
So the pastry needs to be two half-baked pie shells. Grab any two crust pie recipe, put in two pie shells, prick each shell a half dozen times on the bottom, and bake at 400F for 20-25 minutes, until the crust is browned. Some people like to use parchment and pie weights, but I think that's unnecessary as long as you check ten minutes in to see if the bottom is swelling, and, if so, you just poke it to make it deflate, and then there's no need for parchment or weights. You can pre-bake these while prepping the filling.
Before baking the pies though, prep the fruit. Peel and core your apples, chop them up and toss them with 1/4 cup of the sugar, then chop the rhubarb and toss it with the other 1/4 cup of sugar, then set them aside (covered) to macerate. The apples need to sit for at least half an hour before you use them in the next step. Once your pie shells are in the oven, whisk well the cream, flour, and eggs. Add the chopped apples plus their juices and sugar to the custard mixture, and zap it with an immersion blender, stand blender, or food processor, whatever gets the job done. The apple should be soft by this point and should just blend away without leaving any chunks in the custard.
Now comes a quick choice for you to make. Basically, I wanted the custard to be strictly apple flavoured, butyou might like the idea of mixing the flavours. So, if you want your filling to taste of both apple and rhubarb, toss the chopped rhubarb plus it's juice into the custard mixture and pour it all into the shells. If, like me, you want segregation of you flavour states, pour the custard into the shells pour off and reserve your rhubarb juice (I made mango-rhubarb lassi with it!), and toss the rhubarb over top of the custard.
Bake in a 350F oven for 25-30 minutes, until the custard has set.
So, as this is from memory, there are caveats. I have no idea how much rhubarb I used, just use what you want and what you have on hand. I scarcely buy it and instead just get bundles of it from people who have it and have too much (rhubarb is like a weed). As well, I might have used four eggs, I might have used three. Feel free to use as many eggs as you want if you have a better idea.
It fulfilled my objectives pretty much to the letter, by having a very apply custard plus chopped rhubarb. The custard was a bit soft/watery, though, so it might be a thought to either not add the juices from the apples or to reduce that juice first. I was fine with it as it was, but you might have a different opinion after making.
Sunday, January 3, 2010
Brownie Pie: Vegan Blue Ribbon Edition!
I took four of these pies to the Toronto Vegetarian Association's annual Totally Fabulous Vegan Bake-Off, and I walked away with a blue ribbon for taking the Judge's Pick award, plus the six pounds of organic sugar which were the prize. I may have been bragging about this a lot since then, so here, finally, is my recipe for Vegan Brownie Pie.
Pie:
Bronie:
To assemble the crust, start by combining the water and vinegar and refrigerating them. Then mix the flours, salt, and baking powder, and cut the shortening into tiny dice-sized cubes. Cut the shortening through the flour with two knives or a pastry blender, then sprinkle the water/vinegar over top, tossing the dough lightly until all the flour is wet. Form up into a ball, and refrigerate.
To start the brownie batter, combine your dry ingredients in one bowl and your wet ingredients in another, and mix each bowl well. Form a well in the dry bowl, pour the wet bowl into the dry, then mix until combined, making sure to scrape up the bottom and sides of the bowl so no pockets of flour remain.
Take your pastry out of the fridge, and roll your bottom crust and fit it to the pan. Put the brownie batter in the pie crust, then roll your top crust out and cover the pie with it. This dough is a little finicky, so if you get tears, just moisten damage areas with water and patch it up.
Bake at 350F for an 50 minutes, or until a knife/toothpick comes out clean when inserted in the middle.
While deliciously tempting to eat while still warm, I usually offer this pie cold for ease of serving.
ENJOY!
Saturday, January 2, 2010
Tourtiere!
OK I love tourtiere. It is a pretty amazing dish. I made it for the first time this past New Year's Day, and it received compliments from a genuine French-Canadian, so hey, here's the recipe! It uses equal parts pork and lamb, simmered in turkey stock plus the necessary spices and a minimal compliment of sauteed veggies, packaged in a flakey butter crust because butter makes the best pie crusts and you are not going to sell your tourtiere short.
Fillings:
Crusts:
For the filling, start the meat frying (feel free to fry it all at once, but my pan could only really take one pound at a time). You want it to be all broken up, so mix it and prod it. While that's going, start chopping your vegetables. As the meat is done, drain it and dump the meat into a bowl, and continue frying the rest of the meat. When all the meat is done, melt some butter in the pan to fry the veg and put the stock in a pot and bring it to a boil so it's ready when you want it. When the vegetables are all good and soft, combine the meat, spices, and vegetables with your stock and bring it to a boil. Let this simmer gently for an hour or so uncovered. The juice can reduce and get everything good and tasty.
While the filling is cooking make your pastry! There is nothing special here, so you can skip this bit if you know how to make pie already. If you are still reading, combine the water and vinegar and put them in the fridge to keep cool. Mix your flour, salt, and baking powder together in a large mixing bowl, then cut the butter up into cubes maybe half the size of the last segment of your left-hand pinky finger (it helps to bring the butter out of the fridge back when you started cooking so it is workable now). Toss the butter in the mixing bowl, and cut it through the flour. This involves using a pastry blender or just slicing it double-time with two knives kind of like scissors through the flour. Keep cutting it through until you've got a bunch of pea-sized bits of flour/butter.
Spread this stuff over a large work surface, and sprinkle the water/vinegar over it. Gently toss it around then work it together into a big ol' raggedy mass (you may need to scrape some of it off the counter). Put the dough in the fridge to chill while you wash some dishes or something.
When your kitchen's clean again, crack some black pepper into the filling that's cooking on the stove (I have heard pepper is best if you add it only for the last ten-fifteen minutes of cooking). Back to the pastry, roll out and fit two bottom crusts to pie tins, then roll out two top crusts. Back in the fridge again until you're done with the filling!
So, now you've got two pie bottoms and two pie tops ready to go! Time to finish the filling! Hey, you were mixing that stuff on the stove semi-regularly while you were making the pastry, right? Right, OK. Oh you could probably turn your oven on to 375F now too.
Strain the broth from the meat, dump the meat in a mixing bowl and put the broth back on the stove. Mix the meat and the breadcrumbs together, then mix the flour/starch in a quarter cup of cold water. Dump the starch-water in the broth, and cook over medium-high heat until it's thickened up and bubbly again. Turn heat to low and get your crusts out of the fridge.
Half the filling goes in each pie, then the tops go on, then you get four radial steam vents, and they're ready for the oven. Forty minutes or so and the pastry should be done, and you've got two delicious tourtieres!
Afterthoughts and concerns!
I used about a liter of broth because that is what I had. It gave me about a cup too much broth after cooking so that is why I have said to use three cups. Alternatively, use a litre of stock and you'll get some tasty tourtiere gravy out of it, too. Which you might want, so hey, maybe use an extra cup
My 'stock' was about the bare-bonesest of stocks possible, in that I just boiled all the bones plus gibbly scraps of one roasted turkey in water and reduced it to about a litre. I think the pies benefited from this simple stock because I do not think tourtiere needs busy flavours, it just needs simple, strong, delicious flavours mixed together in proportion. Use what you want but if you've got turkey bones, boil them and use that.
I also don't know how long they cooked for, because I put them in then got lost in a book. Just bake them till the pastry's done and brown, as the insides are already OK.
Subscribe to:
Posts (Atom)