Well after being a cripple and incapacitating myself with capsicum I might be ready to bake again.
It was just my birthday and I had a bunch of people over for top-your-own-pizzas, for which I used about 14 cups of flour to make four delicious pizzas which my friends brought toppings for. Ashley might win the topping award for bringing components of and making fresh pesto, though Druker is for sure a close second with that awesome ham. It was about twelve cups whit flour, one cup rye, one cup barley, with the rye and barley getting the pre-ferment treatment I usually use, except no yogurt because about half of my friends are vegans, apparently. That made a pretty good crust.
Now sitting on my counter is a cup of rye flour, a cup of barley flour, half a cup of delicious porter, half a cup of water, and 1/3 teaspoon of yeast. I wanted to make bread for my godmother who is coming in for birthday lunch with me tomorrow, but I don't have time to let it ferment as long as I'd like so I gave it a bit more yeast just for fun. I'll make it into bread tomorrow morning.
Friday, November 28, 2008
Tuesday, November 11, 2008
Sorry
Sorry I haven't done anything recently. My knees have been hurting something fierce since two weeks ago, and I really can't stand up long enough to clean the kitchen, let alone bake something.
Hopefully I will be better soon and then I will make Kyle's cookies for him. Hopefully that will be tonight.
Hopefully I will be better soon and then I will make Kyle's cookies for him. Hopefully that will be tonight.
Tuesday, October 28, 2008
Stupidly Busy, Arguably Vegan Bread (banana-honey-corn-rye-apple)
"James, why is this bread so stupidly complicated?"
"I don't know, why is your face so stupidly complicated?"
"..."
"Whatever."
Banana-honey-corn-rye-apple loaf:
Stuff to have:
Pre-heat your oven to 350ºF
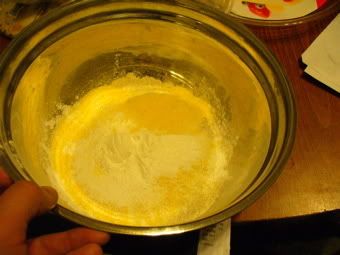
Combine dry stuff in a bowl, mixing till it's mixed.
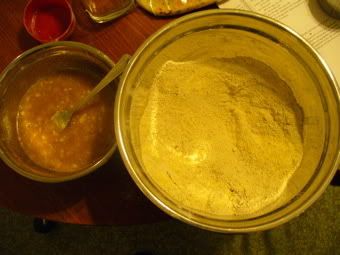
Combine wet stuff in a separate bowl, mixing and mashing until mixed and mashed.
Make a well in the dry stuff, add the wet stuff to it, mix it until it forms a moderately thick batter-dough hybrid.
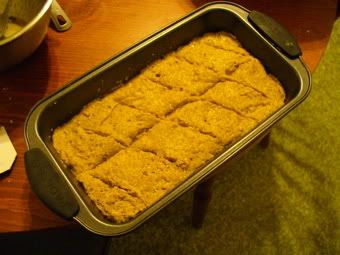
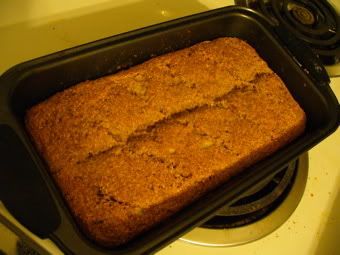
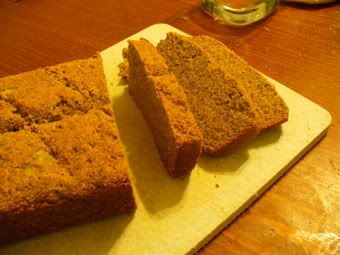
Scoop one cup each of the batter into two loaf pans, then peel, core, and slice the apples. Stick a layer of apples on top of each of the loaves, making sure to leave some room around the edge of the pan so that the apple slices aren't touching the pan directly. Split the rest of the batter in covering the two loaves, then bake for thirty to forty-five minutes, or until a toothpick comes out clean.
I had bananas and honey I needed to use, and a dish I needed to return to a friend that I didn't want to send back empty. This is kind of a re-hash of the banana-corn-rye, just a little bit sillier and done on a larger scale. Probably best for sweet breakfast stuff or a snack in the evening.
"I don't know, why is your face so stupidly complicated?"
"..."
"Whatever."
Banana-honey-corn-rye-apple loaf:
Stuff to have:
Pre-heat your oven to 350ºF
Combine dry stuff in a bowl, mixing till it's mixed.
Combine wet stuff in a separate bowl, mixing and mashing until mixed and mashed.
Make a well in the dry stuff, add the wet stuff to it, mix it until it forms a moderately thick batter-dough hybrid.
Scoop one cup each of the batter into two loaf pans, then peel, core, and slice the apples. Stick a layer of apples on top of each of the loaves, making sure to leave some room around the edge of the pan so that the apple slices aren't touching the pan directly. Split the rest of the batter in covering the two loaves, then bake for thirty to forty-five minutes, or until a toothpick comes out clean.
I had bananas and honey I needed to use, and a dish I needed to return to a friend that I didn't want to send back empty. This is kind of a re-hash of the banana-corn-rye, just a little bit sillier and done on a larger scale. Probably best for sweet breakfast stuff or a snack in the evening.
Friday, October 24, 2008
Zine!
So I am going to be at the zine fair at the starlight Saturday. Doors open at 1PM. Be there if you want a zine and/or a croissant.
Tuesday, October 21, 2008
Croissants
So I made croissant on the weekend. I didn't really follow the recipe as I was lazy and didn't have that much time, but they came out OK. A little dense on account of not letting the yeast get up to speed, and they didn't puff perfectly because I got sloppy and some butter took emergency evasive maneuvers all over the counter, but all in all, a delicious success. If I have time I will make some for the zine fair.
Monday, October 20, 2008
CGRUCOOKIE
Take one on chocolate ginger roll-up cookies:
-use chocolate dough, not just chocolate chip cookie dough so as to make it noticeable that they are swirly
-don't even bother with chocolate chips, it makes them harder to slice
-use more ginger! 1tbsp fresh ginger is not enough!
Zine fair. Saturday. Noon. Starlight.
-use chocolate dough, not just chocolate chip cookie dough so as to make it noticeable that they are swirly
-don't even bother with chocolate chips, it makes them harder to slice
-use more ginger! 1tbsp fresh ginger is not enough!
Zine fair. Saturday. Noon. Starlight.
Saturday, July 19, 2008
Nearly a month since my last post! Whoa!
I have just mixed a sponge which will hopefully turn into something tasty in a day or so. It is: 2 cups barley flour, 1 cup water, 1 tablespoon malt syrup, 1 cup sourdough starter.
When I wake up I'll add some more flour/water and update.
...
10:30 PM - 11:30 AM => that sponge sat for thirteen hours. I added two cups whole wheat flour, one half cup water, and around a half a cup of white flour. That was kneaded, and has now been sitting for just over an hour and a half. I'm going to punch it down, make it into loaves, let it rise again, then bake. Updates when delicious.
Tuesday, July 1, 2008
CANADA BREAD
I started a sponge for a loaf of what was going to be an all rye-flour loaf with cilantro and parsley from my garden. While I was away at work, I realized that it was, in fact, Canada day tomorrow (today). So, here's what's rising on my counter right now:
3PM, day before: proof 1/4 teaspoon yeast in 1/4 cup warm water, combine with 2 cups rye flour, 1 teaspoon salt, and 3/4 cups yogurt. Cover and let sit in a medium warm/cool place for 12-18 hours (18 hours means I'd wake at 9:00 AM the next morning and start baking).
Midnight, day before/of: get home from work and see that your cute little sponge hasn't really sponged too much. Proof another quarter teaspoon of your other yeast with a teaspoon of maple syrup and a quarter cup of water. Mix that in.
Noon, day of: proof two teaspoons of yeast in a half cup warm water, separately mix together a half cup warm water and three-quarter cups of maple syrup. Add the maple water to the sponge, squish it up and mix well, then add the yeasty water. Mix well, then add to five and a half cups rye flour (I used four and added about one and a half while kneading) and knead well. Don't be afraid to flour while kneading, you will probably need it.
Rise twice and bake.
Wednesday, June 25, 2008
Honey Apple Mk. III
I used to bake lots of bread with yogurt but kind of got out of the habit gradually. I bought some yogurt Wednesday so I could make some bread to give to my aunt & uncle for staying with them this past weekend, and now that I've got some lying around, I wanted to make a pie with it.
A two-part yogurt ordeal, I've presently got four apples, peeled/cored/sliced, sitting in a bowl with a half cup of honey and a half cup of yogurt, and for the crust I figure I'll do the regular but I'll leave out the vinegar (because the yogurt is sour/acidic and because it is a milk product) and instead of gradually adding nine tablespoons water, I'll whip together six tablespoons yogurt six tablespoons water and add until moist.
My previous experiments with flavouring crusts with fluid have been just kind of lackluster since nine tablespoons is nothing to three cups, but I'm at least as interested in the texture anyways.
Also, since I don't want to reduce the apple fluid with the yogurt in it, I'm just going to make this a lattice top pie and hope it works out.
Updates when applicable!
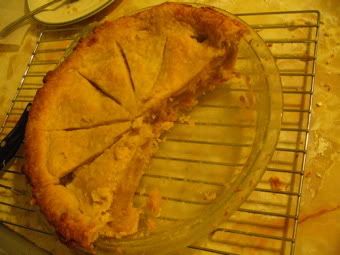
Update the first: Pie is in oven. The crust was
Rolled out the bottom crust, put the filling in. Rolled out the rest of the dough, cut lattice strips, assembled the lattice on the pie, put the pie on a baking pan to catch drips, and covered the pie with foil. It went in the oven five minutes ago and will spend a total of twenty minutes (somewhat arbitrary) covered in foil so as to steam/bake the apples properly, then the foil comes off so the excess fluid can evaporate through the lattice and not leave too soggy a pie. I'm considering leaving the foil on for longer, because apple pie should be juicy, but whatever.
Oh and I meant to sprinkle brown sugar over the apples in the pie before putting the lattice on but forgot! Whoops!
Update the second: Should have left it without foil the whole time, if anything, it looks like the volume inside the pie has increased. Hopefully it's just bubbling/swelling because of the heat. It's going to be a little messy to bike with...
A two-part yogurt ordeal, I've presently got four apples, peeled/cored/sliced, sitting in a bowl with a half cup of honey and a half cup of yogurt, and for the crust I figure I'll do the regular but I'll leave out the vinegar (because the yogurt is sour/acidic and because it is a milk product) and instead of gradually adding nine tablespoons water, I'll whip together six tablespoons yogurt six tablespoons water and add until moist.
My previous experiments with flavouring crusts with fluid have been just kind of lackluster since nine tablespoons is nothing to three cups, but I'm at least as interested in the texture anyways.
Also, since I don't want to reduce the apple fluid with the yogurt in it, I'm just going to make this a lattice top pie and hope it works out.
Updates when applicable!
Update the first: Pie is in oven. The crust was
Rolled out the bottom crust, put the filling in. Rolled out the rest of the dough, cut lattice strips, assembled the lattice on the pie, put the pie on a baking pan to catch drips, and covered the pie with foil. It went in the oven five minutes ago and will spend a total of twenty minutes (somewhat arbitrary) covered in foil so as to steam/bake the apples properly, then the foil comes off so the excess fluid can evaporate through the lattice and not leave too soggy a pie. I'm considering leaving the foil on for longer, because apple pie should be juicy, but whatever.
Oh and I meant to sprinkle brown sugar over the apples in the pie before putting the lattice on but forgot! Whoops!
Update the second: Should have left it without foil the whole time, if anything, it looks like the volume inside the pie has increased. Hopefully it's just bubbling/swelling because of the heat. It's going to be a little messy to bike with...
Friday, June 20, 2008
COOKIES
So I made some pretty sweet cookies for my friends from the internet. I can't recall the precise recipe, I will post it when I get home, but the basic premise was, mix up cookies dough, but before adding the flour, split the soft stuff (1/2 cup butter 1/2 cup shortening 1 cup packed brown sugar 2 eggs dash vanilla 1 tsp(???) baking powder) in half, and give one half white flour (1.5 cups?) and a half cup of cocoa powder, and the other a cup and a half rye flour (1.5 cups) and a cup of chocolate chips.
Place the chocolate cookie dough between two pieces of wax paper, roll it out. Place the chocolate chip dough between two pieces and flatten. Place the layers on top of each, and roll it up. If you want, flatten again and fold to marble, or, if you've rolled it long side up, you may be able to just slice spiral round cookies off of the roll.
Enjoy!
Wednesday, June 18, 2008
Pita Mk. II
My friend gave me some delicious curry this morning, so I figured I ought to make something to give back. My first thought, then, was pita bread again.
Same procedure as last time, except ingredients were:
They are not done yet, though I have high hopes. The problem, though, is in the naming! What do I call corn pitas? Tortilla pita? Torpita? Portittia? Portilla? Torpilla? Tortita?
P.S. dough to wet to roll, cut back by a quarter cup water next time. Rolling in coarse cornmeal made the outsides too crispy/crunchy, I think I'll stick with flour and just dust them off when they're done with a brush.
Corn taste not too prominent, I'll try a higher ratio next time.
Tuesday, June 10, 2008
Pie Bread!
So now that I've acquired some measure of skill in both pies and bread, it is time to commence work on the unholy bastard spawn of both foods!
First attempt:
I proofed the yeast (which had been given to me by a fried who said it was possibly dead after not being properly refrigerated) with a half cup of the water and the malt, cut the shortening (which was slightly more than a cup) through the flour, added the rest of the fluid, and mixed until it was doughy/stretchy. That rose, then I rolled it out flat, poured on some thick smoothie like substance (some apples and strawberries, that had been sitting in a plastic tub in my fridge for a while and were promptly blended last night), and rolled it like what I assume a jelly roll would be like. This rose again in bread pan, and was then baked for about an hour.
I really should have split the dough into two batches and made two loaves, but oh well. It didn't bake through because it was so dense and I didn't let it rise very long in the bread pan. However, I sliced the under done loaf this morning after it had sat/set overnight, then baked them again for curious results. Kind of a dense, slightly chewy fruity thing, which retained enough of the crumbly texture I was going for.
Not a perfect success, but a good first step on my mad adventure. Would make excellent french toast.
Tuesday, June 3, 2008
Experimental Bean Bread
I've just tried to come up with a decent bean bread recipe, I'm not sure how it's going to turn out, but here's the recipe (reimagined after having made it up while making it) that I used:
Proof the yeast with the molasses and a quarter cup of the water. While that's doing it's thing, drain and rinse the beans, then put them in a blender with the rest of the water (I only put them in with one cup, but I think using all of it would give better blending). Put the flour in a bowl and make a well in the middle, then when the yeast is done, pour the liquified beans in the bowl along with the yeast. Mix and knead, rise twice, shape, rise if applicable, and bake.
Will update when done!
Bread has good texture, no particular black bean taste. If you want a curiously coloured bread with some protein, this recipe works, but I think I'll try using a cup less water and three cups less flour as a starting point (my initial plan, before I decided to add a cup of water to help blend the beans after I'd already mixed the water and yeast with the flour) and see if that gives more black bean flavour.
Proof the yeast with the molasses and a quarter cup of the water. While that's doing it's thing, drain and rinse the beans, then put them in a blender with the rest of the water (I only put them in with one cup, but I think using all of it would give better blending). Put the flour in a bowl and make a well in the middle, then when the yeast is done, pour the liquified beans in the bowl along with the yeast. Mix and knead, rise twice, shape, rise if applicable, and bake.
Bread has good texture, no particular black bean taste. If you want a curiously coloured bread with some protein, this recipe works, but I think I'll try using a cup less water and three cups less flour as a starting point (my initial plan, before I decided to add a cup of water to help blend the beans after I'd already mixed the water and yeast with the flour) and see if that gives more black bean flavour.
Monday, May 26, 2008
Special Summertime Beverage Edition!
This has kind of turned into a place to post things for people to use as well as a place for me to record my notes, so, in that spirit, here is a specialtime-summerdrink edition! I posted this on some forums a few years ago, and it initially came from a little (jalapeno) recipe book my mom bought my brother. I make this every summer and love it dearly
Stir and test it maybe every hour or two after the peppers have gone in to gauge it. If making it for a barbecue when you think it'll all be consumed in one day, feel free to leave the chunks in. Remember to sip the drink, don't gulp. Mixes well with gin, if that's your thing.
Stir and test it maybe every hour or two after the peppers have gone in to gauge it. If making it for a barbecue when you think it'll all be consumed in one day, feel free to leave the chunks in. Remember to sip the drink, don't gulp. Mixes well with gin, if that's your thing.
Wednesday, May 14, 2008
Honey Apple Revisited
Anton had us over for steaks he bought on discount last night, so I figured I could contribute to the meal with PIE.
Assessing my assets, I figured honey apple would be the way to go. This involved maybe four smallish apples and three largish apples, peeled and sliced on my handy peeler/corer/slicer machine, tossed around with the juice of one lemon and maybe just over a cup of honey (all that I had left). This sat for a while, until I strained and reduced the juices, then re-assembled the apples and syrup in the pie crusts.
Now, since honey was going to be a more dominant flavour, I didn't want to heavily spice it with any of the regular apple pie things that might conflict with it. So, thinking honey, I went for a whole wheat and almond crust! The crust was (for two two-crust pies) two cups whole wheat flour, one and a half cups white flour, and one cup fresh ground almonds (topped up with walnuts to make it a full cup), with 500 mL of shortening, two tablespoons cider vinegar, seven tablespoons apple cider, seven tablespoons cold water. The water was a bit too much, as it was measured for flour, not nuts, but the blend did a nice job of letting you taste the nuts in the crust this time. I was pleased.
It was a big hit, we actually ended up eating two pies between four people. Also I managed to create a rig that lets me carry two pies on the back of my bike!
Sunday, May 11, 2008
Apple-mango update
I've just made the third incarnation of the apple-mango pie, and I think I like the filling the best this way. There were two smaller, softish apples and one larger, firmer one, chopped up and tossed with lemon juice. For reasons still not entirely clear to me, I blended yesterpie's leftover apple slices, which had gone brown in the fridge, with some cider and zapped it into sauce. Then I cooked it until it was a nice, thick apple sauce. I don't know why I did this, it just sort of happened.
I used a few tablespoons of that as fluid when blending the chopped mango later. It didn't get as much of a smoothie texture as when I blended mango with cider, but I didn't want it to get too wet. So, the blended mango/apple sauce then went into the frying pan with the apples (which went on while the sauce was cooking), got tossed around and cooked as I rolled the crusts, then went into the shell and baked until the crust was done.
It gave a nice soft fruit filling throughout, which wasn't what I was going for, but I think I actually like it more than an apple pie with chunks of mango. This may make a really good turnover filling. I might grind some nuts and use those to make a little firmer still, but I'm not sure which would be best.
Wednesday, May 7, 2008
Pita Bread!
I really actually wanted to write my bastard samosa/fatayers down here before doing something else, but pitas are fresh on my mind so I'll write them down now. The recipe I worked with came from the same book as the first bread I posted, The Laurel's Kitchen Bread Book.
NEED:
Dissolve the yeast in the warm water, let it wake up. Duh. Mix the flours and salt together, make a well in the center, pour in the water and yeast and water, mix, then knead well. I went for a full twenty minutes (two brief breaks), to make sure it was well kneaded, as the gluten is essential to the pocketing. I may try doing it next time for only five to ten minutes to see if laziness is OK, but I don't mind kneading, and my soup was simmering so I had to stay near the kitchen but had nothing to do.
This dough should be fairly soft and be just not sticky. Work in more flour if you think it needs it.
Form the dough into a ball, and let rise for about an hour and a half, until doubled, in a warm, draft free place. It is more important here than with regular bread that the dough does not dry out, as steam, instead of yeast or baking soda, is the workhorse in rising this stuff. The yeast gives it texture and some flavour, but the rising is steam-powered.
Punch it down, let it double again (about half an hour to thirty minutes), then flatten it and divide into twenty to twenty-four even pieces, and smooth those into rounds. Set them aside to rest for ten minutes again, well covered and draft-protected, or you'll get no pocket. Start the oven to 450º F and put your baking stone on the second lowest rack.
Once they're rested, roll out four, keeping the rest covered, then toss them on the stone quickly, trying to make sure they don't fold over on themselves. You'll probably need a lot of flour as you're rolling these because it should be a fairly moist dough still.
Start rolling the next batch of pitas, making sure to check on the ones in the oven after three minutes. If all has gone well, they should puff up like delicious bread balloons. Take them out when they look done; a little browning is OK, but if they get crispy, well, they get crispy and that's not useful as a pocket bread. I'd of taken a picture at this stage because they looked really cool, but I was too busy dealing with the smoke detector because somebody used my baking stone to roast red peppers and it still gets smoky from the juice burning on...
Anyways, these turned out wonderfully on the first go! I was out of whole wheat flour, which is why I used rye (original recipe called for six cups whole wheat bread flour). Bread flour is important here, as the pocket is created when the steam trapped on the inside of the stretchy gluten dough is trapped and pushes the two sides apart. Maybe I'll try an all-purpose flour batch with lazy kneading to see how necessary all of that really is, but I would not risk cutting corners if I was cooking them for something.
The finished pitas were definitely a little floury from all the flouring I did to roll the sticky dough, so I think next time I'll dusting them with corn meal instead. And make corn flour pitas as well!
If you're anything like me, you're going to want to tear one of the first ones open to see if it's done, so, if you do, be warned, these things have swollen like balloons because of steam, meaning there is a lot of hot, pressurized steam inside of them. Keep this in mind when using your hands/looking closely. Don't burn yourself on hot steam. That's really lame.
I can't wait to make a good salad thing to stuff these with!
Sunday, May 4, 2008
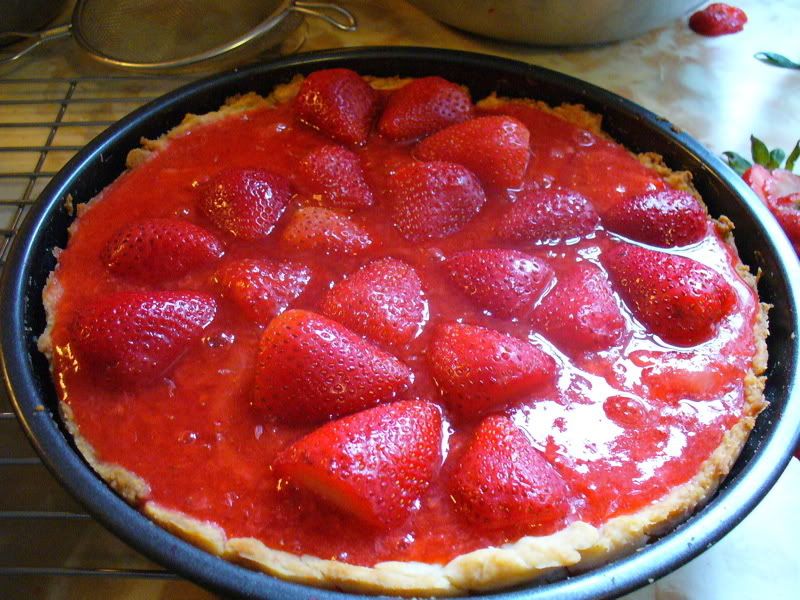
Potluck Part 1: Strawberry Lime!
A week ago we hosted a vegan potluck at my place, which went fairly well. For it I baked a pizza, made an attempt at fatayers which ended up more like samosas, and constructed two strawberry-lime pies.
The pies turned out too tart because I didn't add enough sugar (I actually forgot to buy white sugar and didn't want the flavour of brown sugar mucking around in there), but they were tasty nonetheless.
For two pies, you need:
Throw five cups of the sliced strawberries in a pot with the lime juice, and simmer, mixing occasionally, until you're getting a thicker sort of thing. I'm going to just go ahead and guess that this took about half an hour. Mix the cornstarch in the water well (no lumps!), then add to the simmering strawberries. Add the sugar as well, and whisk that pot all together, and keep on simmering until it's thickened a bit more.
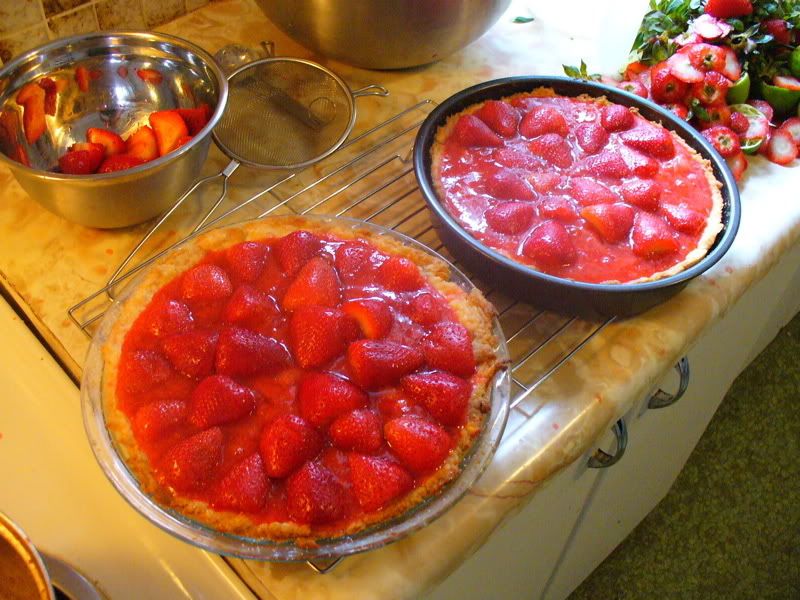
While that's thickening, place the remaining four cups of sliced strawberries in the two baked pie crusts. Once it's done, pour the filling on top of the sliced strawberries, then arrange the layered strawberries on top. Cover and refrigerate until set, ideally at least two hours.

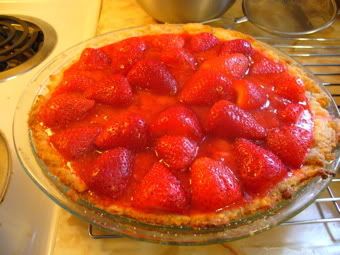

Bigger pictures if you click the images, because strawberries look awesome.
Man, that was a lot of strawberries. All those measurements are measurements after being cut, so I don't even want to guess what the volume would have been before chopping them up.
The filling came out a little too thin/runny, so I think a little more cornstarch might be in order next time. Perhaps less lime juice as well; one cup should have been fine.
I didn't add any sugar to the filling when I made it, so I ran to the store and gave a serious sprinkling of sugar to the filling before laying the halved strawberries down, leaving one pie okay and one still just too tart. A quarter cup is a guess at what would be appropriate based on how much I used and how they came out.
When cutting the strawberries, try and save the nice, regular ones for the top of the pie.
The pies turned out too tart because I didn't add enough sugar (I actually forgot to buy white sugar and didn't want the flavour of brown sugar mucking around in there), but they were tasty nonetheless.
For two pies, you need:
Throw five cups of the sliced strawberries in a pot with the lime juice, and simmer, mixing occasionally, until you're getting a thicker sort of thing. I'm going to just go ahead and guess that this took about half an hour. Mix the cornstarch in the water well (no lumps!), then add to the simmering strawberries. Add the sugar as well, and whisk that pot all together, and keep on simmering until it's thickened a bit more.
While that's thickening, place the remaining four cups of sliced strawberries in the two baked pie crusts. Once it's done, pour the filling on top of the sliced strawberries, then arrange the layered strawberries on top. Cover and refrigerate until set, ideally at least two hours.

Bigger pictures if you click the images, because strawberries look awesome.
Man, that was a lot of strawberries. All those measurements are measurements after being cut, so I don't even want to guess what the volume would have been before chopping them up.
The filling came out a little too thin/runny, so I think a little more cornstarch might be in order next time. Perhaps less lime juice as well; one cup should have been fine.
I didn't add any sugar to the filling when I made it, so I ran to the store and gave a serious sprinkling of sugar to the filling before laying the halved strawberries down, leaving one pie okay and one still just too tart. A quarter cup is a guess at what would be appropriate based on how much I used and how they came out.
When cutting the strawberries, try and save the nice, regular ones for the top of the pie.
Thursday, April 24, 2008
Yes! (Apple-Mango Pie)
Well, that apple-banana pie I made a while ago had too much banana flavour in it, so I came up with something better: apple mango!
It is pretty much the same recipe as that pie, except:
This worked out wonderfully! Instead of banana permeating every bite, the mango only shoes up from time to time, and it adds it's own texture with the chunks that are still left.
I actually ended up discarding some of the mango, but only the parts near to the outside which didn't mush easily under the force of my hands.
Also, I made the pie crust with the juice of a half dozen strawberries, which made a gleefully pink dough, which tragically did not carry through to the end result.
Busy Night (Turnovers for Real)
So, tonight I've made stock, soup, and turnovers, and it's been an ordeal. The soups staying warm on the stove right now, and the turnovers are in the oven, so I can finally sit down and type this stuff out.
Strawberry-Banana Turnovers
No longer the exclusive domain of wacky fruit blend punch juice drinks in brightly coloured cardboard boxes, now you too can have this delicious combination in convenient turnover form, made in your very own kitchen!
You'll need:
So, I put the strawberries on the stove with just enough water to cover, and simmered till they turned into jammy-jelly. I let that cool a bit, made the dough (using all purpose flour to try and get a stretchy dough for easier handling), mushed two bananas into the strawberries, realized I didn't have any white sugar (strawberries get tart when you cook them), said screw it, I'm tired and it's late, then cut the dough into circles of maybe five inches, dolloped the stuff onto the middle, folded them (wetting the edges for better adhesion), then put them in the oven (400ºF). They've been in ten minutes, and I expect they'll be out in another ten.
I know we're in the multimedia age and all, but no pictures this time. I don't actually own a digital camera, I just borrow from other people whom I give food too.
I'm going to go collapse and try not to think about how messy this kitchen is. Will update when turnovers are consumed!
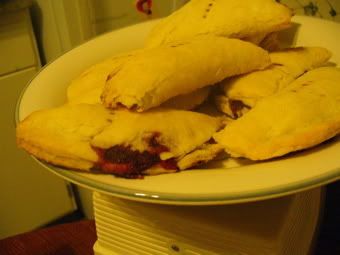
First thoughts: Man, put down tinfoil when making turnovers. That's a mess I'd like to be able to forget about.
Second thoughts: They look delicious, but the pastry is too thick, there's not enough filling, and all I can taste is banana. Next time I'll cook the strawberries less, and add less banana. And probably add some sugar.
Strawberry-Banana Turnovers
No longer the exclusive domain of wacky fruit blend punch juice drinks in brightly coloured cardboard boxes, now you too can have this delicious combination in convenient turnover form, made in your very own kitchen!
You'll need:
So, I put the strawberries on the stove with just enough water to cover, and simmered till they turned into jammy-jelly. I let that cool a bit, made the dough (using all purpose flour to try and get a stretchy dough for easier handling), mushed two bananas into the strawberries, realized I didn't have any white sugar (strawberries get tart when you cook them), said screw it, I'm tired and it's late, then cut the dough into circles of maybe five inches, dolloped the stuff onto the middle, folded them (wetting the edges for better adhesion), then put them in the oven (400ºF). They've been in ten minutes, and I expect they'll be out in another ten.
I know we're in the multimedia age and all, but no pictures this time. I don't actually own a digital camera, I just borrow from other people whom I give food too.
I'm going to go collapse and try not to think about how messy this kitchen is. Will update when turnovers are consumed!
First thoughts: Man, put down tinfoil when making turnovers. That's a mess I'd like to be able to forget about.
Second thoughts: They look delicious, but the pastry is too thick, there's not enough filling, and all I can taste is banana. Next time I'll cook the strawberries less, and add less banana. And probably add some sugar.
Tuesday, April 22, 2008
Turnovers
I'm making turnovers again, this time out of scraps from leftover pie dough. I need to take a step back from the thought that super-gentle is always the way to go. Definitely the nicest looking one right now is the one which I worked a little harder/longer(/faster/better), so it'll have some stretchy/chewiness from being worked, but that probably won't be a bad thing, as it's rising and forming a nice, curved, pocket shape.
I think when I try making a batch of turnovers, I'll use all-purpose flour instead of pastry.
I think when I try making a batch of turnovers, I'll use all-purpose flour instead of pastry.
Sunday, April 20, 2008
Banana Corn Rye
Alright, that's enough pie for now (that's a lie, I'm going to make more tomorrow), so here's some bread again. This is something I came up with not because I wanted vegans to have some tasty bread, but because I've spent enough time behind enemy lines that I know how to use their tricks to further my own dark ends.
Never assume your foe has nothing to teach you, for then your arrogance will surely defeat you!
Banana-corn-rye bread:
Need:
Mix the dry ingredients together in a bowl. That's it. Do a little dance or something. Anything, really, just so I have more than one instruction in this paragraph. Oh! Mound and make a little well in the dry stuff.
Mix the syrup with the warm water, and mix till well dissolved. Add the oil, then mash and add the bananas. Mix the works together, then pour into the dry bowl, and mix just until moistened.
Bake in your magically pre-heated to 350ºF oven for about half an hour, or until a toothpick comes out clean.
This resulted from re-working an already re-worked recipe for corn rye bread. I just swapped up an egg and a cup and a quarter of buttermilk for a cup of bananas and a half cup of water (standard vegan sub is a banana to two eggs). The water is warm only to make it easier to melt the malt.
Regarding the malt, you can feel free to use molasses, honey, or just sugar if you feel like it. I'd go to about half the volume if I was using straight sugar, though.
This is a pretty delicious breakfast bread which I've made a few times now.
P.S. I think next time I'll take it down to just a banana and a half, for flavour reasons. I think the water level won't go up, though.
Also, I'll use a finer corn meal to try and better get that taste out there.
Friday, April 18, 2008
Apple-Banana Pie
I haven't really had anything I could call a 'failure' for a while, so tonight, I'm trying something silly that I don't think will work. Instead of making another apple-strawberry, I'm making apple-banana pie!
Banana has a way of being a jerk at parties and monopolizing the conversation and talking about it's interests in a really loud voice while everyone else is just trying to chill. I've tried to get around this by skinning one banana alive, then mashing it to little bits. Also, by only using one banana.
Need:
Chop up the apple, toss it with the lemon juice, sugar, and cinnamon, let macerate for a while (half hour-three hours). Cook it in a fry-pan over medium heat for maybe five to ten minutes; until they're getting cooked but well before they start to try and be apple sauce.
Strain the apples, and return the juice to the pan, where you'll hit it with medium-low-medium heat, swirling to prevent burning, until it's boiled down to a syrup and smells a bit like caramel. Pour the syrup over the apples and toss them to coat evenly. Then, mash that banana to a pulp, and toss it in with the apples. Let this mixture sit while your housemate is using the oven to make an obscene amount of roasted veggies. Go read a book or update your website or something.
Roll out a pie crust, put the stuff in, and bake until done. I'm guessing this'll be forty five minutes, I haven't actually cooked the thing yet.
Here's what it looks like right now:
(SEXY) RESULTS:
Fairly delicious pie, a little heavy on the banana flavour, but that's what happens when you use banana. Either I didn't add as much cinnamon as I thought, or it got burnt away when I reduced the syrup, because that flavour was lost, when I was hoping it'd help moderate the banana potency.
On the bright side, this did give the filling an excellent consistency and it didn't fall apart at all, making it ideal for on-the-go applications, such as my hopefully more rugged next incarnation of turnovers.
Wednesday, April 9, 2008
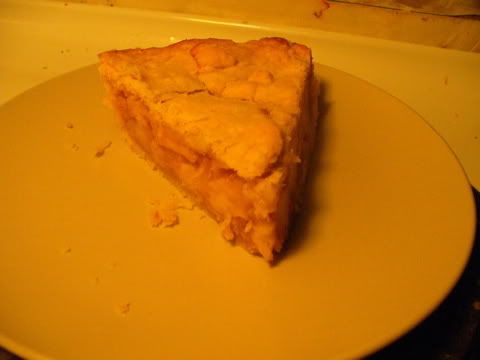
My Apple Pie
I've just made yet another pie, this time apple. I think I've found the recipe that'll become my signature/standard apple pie, this one was pretty good. I wanted to do apple pie differently but without going way off and adding something that'd change it too much, so I added some honey as a sweetener, which worked out lovely.
Also, I experimented with an almond pie crust, and almonds and honey work great together as well.
Crustin!
Fillin!
Compilin!
So, this achieved my goals of being a delicious yet slightly different apple pie which I came up with myself, so I'm very pleased. The almond crust will definitely also be used again as well. All in all, a good pie, but don't try and cut slits of approximately constant radius like I did, as that makes it hard to serve the pieces without them falling apart in the middle.
More Pie!
It seems that recently, what I make more than anything else, is pie. Since Pi day, I just haven't been able to get enough of this beautiful substance.
The other night, I whipped one together on a whim in the twenty five minutes after discovering my uncle hadn't prepared anything for desert at my grandparent's house and before his delicious roast and things came out of the oven, using odds and ends about the house. It was pretty tasty.
Though I've made a good few recently, this entry will just be about 6.28.
Strawberry-Apple-Lime pie:
This pie came into being when I wanted to use the strawberries I'd bought a week prior. It involved a layer of softly cooked apples with lime juice and a layer of cooked-till-almost jelly strawberries. I remembered to take notes while making it, so I can actually give the real numbers I used and not approximates made after the fact! I didn't take times, though, so that's a bit iffy.
So, the pie turned out well. It wasn't really supposed to be a lime flavoured pie, I just figured there wasn't enough lemon juice in the lemon, so I threw in the full lime's worth when I probably shouldn't have. On the bright side, though, it kind of simulated the rhubarb that I wanted but could not find, so it all worked out anyways.
The one thing I learned, though, was to cut larger steam vents when dealing with goopy stuffing. The syrup just kind of gummed the works up and made the top rise too high, the started escaping from the corners. Not too bad though.
Brownie Pie:
This was another adventure in "what can we make at Colin's place with limited resources", and I think it might be better than the last time.
We had on hand a tub of classy margarine that had partially melted in his car, a pack of brownie mix, an egg, flour, and an overpriced convenience store nearby from which we bought chocolate chips and pecans. Results were better than expected.
Ridiculously rich, the fudgy brownie texture contrasted wonderfully with the flaky crust, which didn't turn out nearly as poorly as I thought it would.
Also, you can't eat anywhere near as much brownie as you could pie or cake, this was too much to eat.
Monday, March 31, 2008
Quasi-Beef Wellington
In my fridge today were two things that I needed to eat today: 1) a 'baseball' steak from the market on Saturday, and 2) four turnovers worth of pastry leftover from my last adventure. Something my little brother made (with limited assistance from me) when I was home in December was beef wellington, so I figured I'd give it a shot. It turned out to be a pretty sweet way to serve a steak for one, without sides.
So.
To recreate, you need:
First, heat some oil in a pan, and while it's warming, chop the mushrooms, onion, and garlic finely. (Actually, no, first turn the oven on to 400ºF, then do what I said to do first.) Toss the mushroom in the pan, fry a few minutes, then throw in the rest and cook till the onion is translucent. Scrape all that stuff into a bowl, and set aside to cool.
Heat some more oil in the pan (hopefully there is some of the old stuff left there), and when it's hot, sear the steak on medium-high for three minutes a side. If there's still red on the short side and it's too thick, hold it with some forks or something and sear it all around. That's probably horrible form, but it's fun anyways!
While the steak is cooking, roll out your pastry, until it's large enough to wrap the steak. When the fried fungus and vegetables have cooled, spread them over the pastry, leaving a decent border with none on it, and wait for the steak. When it's done cooking, place it on the stuffing on the pastry, wrap it up, and put it in a pan in the oven, and bake for about thirty-five minutes.
Remove from oven, put it on a plate, and devour.
Thoughts after the fact:
Thursday, March 27, 2008
Turnovers!
So, Colin and I made a delicious pie last night (mostly his initiative, I just made the dough and the rest turned out great), and I've still got four pies worth of dough in my freezer since I got sick on Pi day, and I've still got an army's worth of apples in my fridge, so, it's Turnover Time!
In a frying pan on my stove right now is some delicious apple filling. Consists of:
Which I let sit for maybe fifteen minutes to half an hour, covered on the counter, before hitting it with medium-low heat in a big frying pan. The idea here is to extract what fluid from the apples as I can now, and reduce it to make a nice, thick filling
On my counter right now, are sixteen roughly equal sized balls of dough, thawing, waiting to be rolled out into rough circles, stuffed with apple goodness, and then baked at 400ºF for twenty minutes or so.
Deliciousness awaits!
P.S. In oven now, first remarks: cut actual circles/rectangles when baking turnovers, it will make them much easier to manage when filling!!
P.P.S. Delicious, if messy. Next time, I'll roll the dough a little thicker, so as to make them easier to handle, both in and out of the oven. These turnovers are by no means sturdy enough to take as a snack for the road, as was the intention.
Thursday, February 21, 2008
Simple Start
Right, so I guess a good first post is just a multi-role all-environment utility bread. I'm going to copy roughly from the Laurel's Kitchen Bread Book, one of my favorite bread books, and add my thoughts.
So.
Make the sponge
So, when I make this, I've never used the milk powder. That stuff scares me a little bit. If you leave it out, it'll be OK, and if you want to just replace some of the water with milk, that's cool too. Milk powder is apparently popular where using milk would throw off the consistency, but really, if you're adding milk powder and water, just add milk and water.
Personally, I like to use a quarter cup yogurt and just over a half cup of water, or some combination of yogurt and water, since that's given me the tastiest bread.
Regarding flour, I also like to use rye flour here, since the acidity of the yogurt will break down the harsher parts of the rye and let it make nice bread (all rye bread should have a sour element to it to make the flour behave). One cup rye and one cup whole wheat is what I've been doing lately, though always remember that rye absorbs less water (or is absorbed more readily into water, whatever), so the fluid ratio will be a little off. This doesn't matter as much in the sponge, though, since you'll just work it into the bread later.
And in case you're afraid or think you misread that, yes, you leave a yeasty sponge on your countertop for at least half a day. This is totally cool. It should triple in volume in that time, so make sure you've got something large enough. Using a pre-ferment like this makes the bread extra tasty.
Anyways, on with the show.
Well, that's kind of the bulk of the work right there. For adjusting the water/flour, you'll just figure it out in time, but if you can knead it without too much work, and it's not too sticky to handle, you're probably in the safe-zone. Kneading is a bit of a learned skill as well, and there are plenty of things online that ought to be able to do a better job of explaining that than me, such as this semi-reputable looking article. The important part of kneading is to stretch the dough without tearing it (too much), so you work it into nice long sheets of gluten which will trap the gasses from the yeast and let your bread rise. If anyone is unsure about kneading technique, I am totally happy to come over/have you over to make bread sometime. It really isn't that hard, but baking is a fun thing to do with people!
For shaping, I like to make one or two big round things on my baking stone, or just do simple loaves in pans. Loaf pans usually come out in about fifty minutes. As for page 106, well, I brought the book back to the library and didn't copy that page down. I just put an old pan on the bottom rack of the oven with some water in it when I heat the oven, and set the oven to 400ºF for the first five minutes, then drop it down to 350ºF for the rest of the time. When you think the bread is done, the easiest thing to do is to pop a loaf out, and knock it on the bottom. If it sounds hollow, it should be done, but you can certainly reserve the right to take it out before it sounds hollow if you think the crust is getting too dark.
One of the best loaves I've made was this recipe with garlic and olives in it. I coarsely chopped the stuff up, then added it while kneading the dough. The garlic was obviously delicious and the little bit of residual juice on the olives worked through the dough to give it a nice, subtle olive flavour throughout.
Anyways, I am tired now, so I'm off to bed. Happy baking! I'll try to keep this thing up weekly.
MISSION STATEMENT
Well, this is to be a log of things I have made, thoughts I have had about those things, and possible improvements based upon the thoughts I have had about those things.
Primarily, those things will be some form of bread or bread resmbling entity, though pastries are also expected within the intended scope of recording. Presumably, other forms of foodstuffs may also appear from time to time, if they merit attention.
Allons-y, Allonzo!
Primarily, those things will be some form of bread or bread resmbling entity, though pastries are also expected within the intended scope of recording. Presumably, other forms of foodstuffs may also appear from time to time, if they merit attention.
Allons-y, Allonzo!
Subscribe to:
Posts (Atom)