Sunday, October 3, 2010

Apple Chicken Pot-Pies

So I bought too many apples. Ohno apples.

Basically, tiny chicken pot-pies in a muffin tin, plus apples, added raw to the filling just before it went into the shells.
Came out pretty delicious, but I am pretty goddamn flexible with my palate by now. I do not think I would necessarily serve it as a main, but it makes a nice hor-deerv. Probably would want to just go all the way and make little puff-pastry things out of them instead, in that case.

Wednesday, May 19, 2010

Crackers!

Crackers are pretty exciting to me! You can get them in boxes and they are OK, but there is something about how they are a factory-made kind of thing that makes me want to make remarkable crackers by hand. Just kind of saying 'hey look I can make stunning crackers I am as good as a machine'.
Anyways, I made my first batch of crackers today after reading up a couple recipes. Predictably, I added rye flour and buttermilk to the mix because I am all crazy for rye and buttermilk. Basically, you want to cut some flour with butter shortening as if for pie, then mix it with enough water/milk to make a dough. Also, you want some baking powder in there too to puff it up.
  • 1/2 cup white pastry flour
  • 1/2 cup rye flour
  • 1 teaspoon baking powder
  • 1/4 cup butter
  • 1/3 cup buttermilk
  • Mix your dry stuff, set your butter to "Coarse Meal", turn said meal onto a clean counter, sprinkle the buttermilk over top, and toss together until you've got a dough. Lightly flour your counter and roll out the dough into a big rectangle (1/8 inch thick or less), and trim the edges. Cut crackers, prick with fork a bunch of times, and bake at 350ºF for 7-10 minutes.

    I made two batches, being the first batch and the 'scrap trimming' batch. The first ones stayed mostly flat and have a nice crumbly texture but didn't puff up much, the second ones got worked a little harder as they were rolled and re-rolled, and they puffed up a couple large pockets. I'm not sure exactly how done I want these to be. One thing with rye flour is that it cooks much darker than wheat, in that where wheat would be golden-brown, rye looks burnt-brown. Some of my crackers are still pale, some of them are dark and crisp, and I'm not sure which I like better. Warm, I'm loving the paler, softer ones with goat cheese and shaved smoked brisket, though the crispy fellows will probably keep better.

    Will certainly make more crackers later, these are pretty simple!

    Monday, April 26, 2010

    Peanut Butter Chocolate Cookies

    WHAM BAM HEY HO LOOK IT'S MORE COOKIES


    TAKE: 1/2 cup butter, 1/4 cup smooth peanut butter, 1/4 cup chunky peanut butter, CREAM TOGETHER on high in a mixing bowl.
    ADD: 1/2 cup white sugar, 1/2 cup packed brown sugar, BEAT until combined
    BEAT IN: 1 egg, dash vanilla, 2 dashes baking powder.
    ---PARTITION BATTER IN HALF---
    --FIRST HALF
    INCORPORATE: 1/2 cup flour, 1/2 cup chocolate chips
    MIX, SET ASIDE
    --SECOND HALF
    INCORPORATE: 1/2 cup cocoa powder, 1/2 cup flour
    MIX, SET ASIDE
    ROLL OUT the chocolate dough (should be stiff) on parchment paper, to 1/6 inch thick. DUMP the chocolate chip dough on the chocolate dough, and spread it around. USING THE PARCHMENT PAPER AS AN AID, ROLL UP both dough together. Form the resulting log into a ball, as you would to shape a loaf of bread, by pulling it down and pinching it together in the back. REPEAT this motion a few times, until you've got some nice marbling happening.
    PLACE neat little balls of dough onto parchment which is itself on a baking pan, then bake at 350ºF for seven minutes if you flattened the cookies, nine minutes if you left them as balls.

    Monday, March 29, 2010

    Mail-Box Cookies

    Things need to have names. I can't just call everything utilitarianly descriptively 'oatmeal chocolate chocolate cookies w/buttermilk and coffee'. In this high-paced world of aggressive market branding, I need to name things with catchy, memorable, distinctive names, lest I be swept up in the latest wave of Pepsi-Chip Super Sweet Biscuit Snacks or something.
    So, since these cookies are designed for optimal mailability (spell check has not called me on that, I can not believe mailability is a word!), they are called mail-box cookies for now. Maybe I will think of something better later, I am not totally pleased with that name, but moving on, recipe time:
  • 3/4 cup butter
  • 1 cup packed brown sugar
  • 1 tbsp coffee (espresso, strong stuff!)
  • 1 tbsp buttermilk
  • dash vanilla
  • 2 egg

  • 3 cups quick oats
  • 1/2 cup cocoa
  • 1/4 cup flour
  • 1 cup chocolate chips
  • 1 tspn baking powder

  • This recipe is just a modification of the recipe off the bag of oats, but I have made it better by killing the raisins and adding exciting things like chocolate and chocolate chips and coffee. I discovered the outsides made nice-ish crispy shells that kept the insides soft for a notably long period of time, hence my desire to mail them to people.
    In bowl the first, cream your butter and sugar together with beaters at medium-high, then add the rest of the wet stuff and beat until creamy.
    In bowl the second, mix all the dry stuff.
    In bowl the third, combine bowls the first and second and mix until combined (bowl the third should be a symbolic pointer to either bowl the first or bowl the second).
    Form into balls the size of the balls inside of golf balls, put on a cookie sheet w/parchment paper, and bake at 350ºF for twelve to fifteen minutes, until they firm up.
    The differences between this and the recipe on the bag that I based this on are that I scrapped raisins, cinnamon, white sugar, and most of the flour, increased the brown sugar, added cocoa, chocolate chips, coffee, and buttermilk. As well, I made the cookies larger and formed them into balls so that the insides would hopefully stay soft as they travelled in the postal system.
    Essentially, they are either buttery chocolate cut stuffed with oats, or oats cut with buttery chocolate.

    If you are lucky, maybe these will show up in your mail box.

    Sunday, March 21, 2010

    Buttermilk Brownies

    I love brownies and I love buttermilk, so I thought I'd try and combine the two. Also I am hungry and wanting brownies and no cafes are open past 8:00 PM in this nutty little town.
    Anyways, here's the first take:
  • 1/2 cup butter
  • 150 ml cocoa powder
  • 1/4 cup coffee (espresso)
  • 1/4 cup bttrmlk (my first rock album will be titled 'BTTRMLK', I have decided)
  • 1 cup sugar
  • 1 egg
  • 1/2 cup chocolate chips (actually I forgot these but you shouldn't)
  • 1 cup flour
  • 1/2 teaspoon baking powder


  • OK go go go MELT the BUTTER in a pot over medium-low heat. When melted, add the COCOA POWDER, mix well, remove from heat. Add SUGAR, mix, add COFFEE and BUTTERMILK, mix, add EGG (sans shell), mix just until combined. That reads a bit like one of those old-style text based adventure games, doesn't it? Weird. Combine the flour and baking powder in a big ol' bowl, add wet ingredients plus chocolate chips, mix just until combined (but do make sure you haven't left any flour clumps in there, those are unpleasant.
    Portion batter into a greased muffin tin, bake at 350ºF for fifteen minutes or until a toothpick comes out clean when stuck in the middle of the biggest of those suckers.
    You could go ahead and use a brownie pan or something, but then you've got to cut them and things, whereas a muffin tin gives you delicious, good-to-go little servings.

    Post-analysis: These are a little cakey. There must have been too much fluid in the batter, and there wasn't enough chocolateyness too them. Taste pretty nice, but they are not what I was going for.
    Not terribly sweet, which I like (and mom likes, apparently), and you can't really pick up on the buttermilk flavour too much. I think the simplest thing might just be to stick with cream-cheese if I want to the cultured dairy flavour in brownies, because buttermilk brings too much fluid to the stage.
    I may try a brownie recipe with strained yogurt later.

    Friday, February 5, 2010

    Pita Bread Photos

    Don't think I ever posted pictures of pitas in the oven before, but they are one of the more interesting things I've baked. They swell up like balloons with steam and look ridiculous!
    I don't think alt text is working?
    Look at that ridiculous one in the back! He is like, standing on his tippy-toes or something!

    On Updates:

    So bi-daily was a nice idea but I found myself scrambling or dredging through the kitchen sometimes when I didn't want to be. I would like to have a regular schedule, and when possible I will endeavour to do such, but I think a much more useful meter will be to set out some targets and try to get those done within the month.
    To that end, my immediate goals are makowiec, hot cross buns, and pizza pops. For makowiec, I'd like to do a bunch of reading and do a write-up with sources and references and what I changed and why. Hot cross buns I will try a few different things with, like icing cross versus pastry cross or yeasted dough versus baking powder. The hot cross idea that sounds the best in my head right now is just making little brioche rolls and putting a sweet pastry cross with a hint of almond on top. Man I am looking forwards to that.
    Also, pizza pops! The samosa dough I just used should work fairly well for that. It'll definitely take some work to perfect the filling, though, and I think I'd let the yeast get up to speed a bit more and let them rise a bit before baking so we get a lighter, pizza-ier dough pocket.
    Also I'd like to make some 'healthier' (not full of butter) breakfast muffins, but I so completely non-stoked for baking muffins without butter that that is definitely lowest priority in my mind right now.
    That's mostly what I hope to get up to before march, and I think it's very doable. I'm aiming to get those things done well and have some simple updates like 'pastry scraps:' or 'baked in buttery pastry in a ramekin'. Ten posts in February will be my minimum goal, assuming I don't leave town for a week again!

    Wednesday, February 3, 2010

    Samosas!

    We are kind of living an exercise in frugality right now, so the question of the day was how to feed two people with the one chicken breast left in the freezer. The answer: samosas! These are essentially dough packets, stuffed with a fairly dry potato & chicken curry. None of the samosa recipes I referenced called for either eggs or yeast in the dough, but I love the yeasty taste in dough and I thought an egg would give us a richer pastry, so that's what I did. Samosas, as I interpret them, are just some sort of curry dish stuffed in some sort of pastry, and this is what I came up with.
    Dough:
  • 1/2 cup warm water
  • tspn sugar
  • tspn yeast
  • 1/4 cup oil
  • 1 egg
  • 2 cups all purpose flour
  • OK, proof the yeast in the warm water with the sugar in some sort of proofing vessel (like a bowl!). When it's floated up from the deeps, add 1/2 cup of the flour, mix well, cover, and set aside for an hour in a not-cold place. When that's done, it should be bubbly and alive, so add the oil and egg and mix well. Add a cup of the flour, mix until it forms a raggedy messy mass, then work in the rest of the flour until you've got a nice feeling dough. Knead well for at least ten minutes, because you do want this dough to be stretchy, strong, and workable. Form it into a ball, and let it rest & rise while you fix the fillings.
    Filling:
  • oil
  • 1 tablespoon mustard seeds
  • 2 medium-small potatoes
  • 2 cloves of garlic
  • 1 tbspn fresh ginger
  • 1 tbspn garam masala
  • 1 tspn crushed chili peppers
  • 1 onion
  • 1 carrot
  • 1 chicken breast, chopped small
  • 1/4 cup stock (whatever kind)
  • Cut the potatoes into 1/4 inch cubes and parboil them for five minutes. Put the oil in your cooking pan, add the mustard and heat it up. When the mustard seeds are crackling and popping, it's ready for the garlic and ginger, which should be minced together, and, if you have it, mashed up in a mortar and pestle. Fry the garlic and ginger for about thirty seconds, then add the garam masala and chili flakes. Toss in the chicken and onions, and when the chicken looks cooked on the outside, through in the chopped carrot and potatoes. Fry a little longer, then add the stock and let cook uncovered. Once the stock has all cooked away, it's ready to go! Let this stuff cool while you prep the dough.
    Defleat then divide the dough into six equal portions. Form each piece into a ball and roll out into a big circle, about an eighth of an inch thick. Keep the rolled circles covered to prevent them from drying out, as this makes them more difficult to handle. When they're all rolled, Cut them in half, place stuffing on half of each half, leaving a border and fold over, stretching the top flap as necessary to fit over the filling. For those of you in Waterloo, this makes them in the style you get at Farah's foods. I have an certain fondness for those ones because of all the times I've wandered from the MC to Farah's at 4:00AM looking for matlab fuel. Diagram (grey is filling, fold from left over right):
    Filling is gray, pastry is the semi-circle, fold in half from left to right
    Bake in a greased pan or just on parchment paper at 350F for 20-25 minutes, until the pastry is cooked.
    in the oven
    I did two sizes to see how they'd go. I ate three of the tiny ones for lunch, mum had two. The bigger ones might be good for a breakfast or lunch on their own. I'm having one of the big ones for breakfast tomorrow, and the other big one is in the freezer, and mom will eat it for lunch on Saturday. Part of this experiment is to see how well these things freeze for re-heating, so I'll update when the frozen ones are consumed.
    Post-analysis on the samosas has determined that the filling could have been a bit tastier. Maybe more spices would of helped, or more garlic or ginger. If you think that you can make a better curry than me, you probably can. I am OK at curry but not great. If you deviate, just remember that you want your filling to be fully cooked and edible before baking. Mom thinks they'd be better if they were a little wetter inside, so perhaps it might be an idea to add a bit more stock and then thicken it up with some starch or flour.
    The dough is also a little cakey in the crumb. I'm OK with this, it is the product of my yeasting and egging it. The dough would be OK without those, though, if you don't like the texture.
    I am a cross-section junkie

    Thursday, January 28, 2010

    "Marzipan" Muffins

    I don't know if anyone else has noticed this weird thing the bulk barn has that's labeled 'almond paste', which appears to be some sort of cheap approximation to marzipan. It is yellower than marzipan, it handles a little stickier, and I think they might of even slipped some vanilla in there to make up for its deficiencies in the almond department. Anyways, it's about a bajillion times cheaper than actual marzipan and given my love of marzipan yet limited budget, I like to pick some of the stuff up when it's on sale (which is always, for some strange reason).
    I'm almost out of muffins again, so it's muffin time again (again!). I think I might be going a little nuts on muffins, this'll probably be the last time for a while that I make them. Basically I'm just doing chocolate chip muffins plus chopped up almond paste, with honey for to go with the almond with. OK that last sentence had something weird going on but I like the way it sounds if I say it, so redundant words remain.muffinzipan
  • 2 cups all purpose flour
  • 1 cup wheat germ
  • dash salt
  • shake of baking powder (look I don't measure it that would dirty a spoon come on now)
  • 1/2 cup butter
  • 1/2 cup milk
  • 1/2 cup honey
  • 2 eggs
  • 1cup chocolate chips
  • 1/2 cup chopped "almond paste"
  • I started by setting the oven to 350ºF and using the heat from the oven exhaust to melt the butter, then I combined the flour, wheat germ, salt, and baking powder. The almond paste was chopped up to bits about the size of the chocolate chips and then added, with the chocolate chips, to the flour bowl.
    The butter was melted by now, so that hit the milk and the honey and the vanilla, got mixed, and then the eggs joined the party and got beaten up.
    Everybody together now! Mix just until combined! Put it in a muffin tin, let it go, 18 minutes hey-ho!

    They came out pretty tasty, but way too sweet for my everyday breakfast muffins. That almond paste stuff is pretty sweet. They are too heavy to be cupcakes, but they seem pretty cupcakey, what with the vanilla, the almond, and the sweetness. Perhaps the honey could be halved next time. ALSO! If I do this again, I will use little paper cupcake liners, because the almondzipaste baked and bubbled and gummed everything up pretty good.
    Not what was I going for, I guess I'll have eggs for breakfast tomorrow or something. Still pretty tasty!
    I guess the room for pondering here would be in what flour variations would work. I think barley could work but I always think barley could work. The only non-wheats I have on hand right now are rye and buckwheat, though, which I don't think would work.

    Tuesday, January 26, 2010

    Baked Egg Update

    spinachspinachcheese
    Baked eggs in pastry again, this time with chopped fresh spinach and grated cheddar. Baked only 25 minutes this time, got semi soft but I think there will always be a problem getting these things to have soft yolk but cooked whites when it's two eggs in one ramekin. When I finally have a reason to do a dozen I'll post the times from that.
    Spinach and cheddar and eggs are a solid combo.

    Sunday, January 24, 2010

    Plantain Chocolate-Chip Muffins

    So I'm a muffin addict and I've been using up some plantains I bought, so here are plantain & chocolate chip muffins.
  • 2 cups white flour
  • 1 1/2 cups wheat germ
  • 4 tspns baking powder
  • dash salt
  • 1 cup chocolate chips
  • 1/2 cup butter
  • 1/2 cup milk
  • 1 cup chopped plantain
  • 1/4 cup brown sugar
  • 2 eggs
  • Take your plantain, chop it up, and toss it with the sugar to soften. If you're on top of the game, do this a half hour or more before you start the rest of the stuff so they have time to soften in the sugar. Start by mixing your dry ingredients together in a bowl, then put the butter, milk, and plantain in a food processor or blender and zap it up smooth. Mix the eggs in with the wet stuff (pulse quickly or just mix in with a spoon), then dump the wet stuff in with the dry stuff, and mix just until combined. Portion out into a greased muffin tin, makes 12 muffins. Bake fifteen minutes or so at 350ºF or until a knife/toothpick comes out clean when inserted in the center of a muffin.

    Friday, January 22, 2010

    Honey Cookies

    Honey is pretty awesome. I don't know if it has any health benefits, and I'm purposefully not looking it up because I want to maintain my delusions that it somehow makes me well to eat lots of honey. I mean, it's a natural organic local product, right, it's got to be good for me?
    Anyways, I made some honey cookies because I wanted to make some tasty cookies. Here goes!
  • 1/2 cup butter
  • 1/2 cup shortening
  • 1 1/2 cups honey
  • 1 tablespoon fresh ginger
  • 2 1/2 cups flour
  • 1 cup wheat germ
  • 1 teaspoon baking powder
  • chopped nuts or chocolate chips for topping
  • Cream the butter and shortening together, then beat in the honey and eggs. When that's good and mixed, add the flour, wheat germ, and baking powder. Mix until you've got a good cookie dough, then form them into balls on the size of two tablespoons, dip in the chopped nuts or chocolate chips, and bake at 350ºF for 9 minutes. If you want smaller cookies, make 'em smaller and cook a minute or two less. I like big cookies.
    I also forced myself to make cookies without chocolate chips in them but decided to top the last batch with chocolate chips anyways because I am a fiend for chocolate chips.

    P.S. Serve with black coffee! They are pretty sweet and simple in flavours but pair well with strong simple flavours like espresso.

    Thursday, January 21, 2010

    Baked Eggs

    I was thinking about cute breakfast foods the other day and thought that baked eggs with pastry might be a cool thing to make. Ideally, I'd like to make a dozen baked eggs in a muffin tin, but whereas I do not have a dozen eggs worth of egg-eating people around, I've just done two eggs in a ramekin instead. The recipe is actually set for four of these things, but you can always make as many as you actually want and leave the leftover pastry for scraps for later, or even use them to make a sweet breakfast pastry for after the eggs. I've added in some fried mushrooms, onions, and garlic because I'm eating it for supper, but you can augment these with whatever you might put in an omelette (cheese, chives, roasted red pepper, whatever).
    it is only 352 pixels wide so you cant see the shaky-no-flashy
    Anyways, TO MAKE:
    -mix one cup pastry flour with a dash of baking powder and a dash of salt
    -cube one half cup butter, then cut it through the flour
    -sprinkle three tablespoons water on a little at a time, mixing gently
    -turn onto a floured work surface and work slightly until it is just cohesive
    -cut into quarters, place in fridge
    -fry up half a portabello, two cloves garlic, and half an onion, all minced
    -remove pastry from fridge, roll the quarters into circles, then place them in greased ramekins
    -portion the fried business into the ramekins, then crack two eggs per ramekin on top, and season with salt and pepper
    -bake at 350ºF for half an hour

    I've seen another recipe online that calls for putting in one egg, then the bits and bobs, then the other egg, and that gives a cool effect too, but I just prefer the bits on the bottom of the egg.
    Also, I like my yolk hard, so take a few minutes (five or so) off the bake time for runny yellows.
    cross-sectional!
    Also, in retrospect, the pastry might still be OK with only a third of a cup or butter. Having an eighth of a cup of butter per serving can't be a good idea.

    Monday, January 18, 2010

    Plantain Pie!

    My objective is to be updating this blog every other day now. I didn't keep up while I was away this past half-week, but I've got two things to type up that I baked but didn't blog while living with the vegan kitchener crew.
    Keeping up with regular posts means some of these posts will be cool, some will be 'hey bake this in pastry scraps', and some will be 'so this didn't work, but I think I can fix it'. This plantain thing is a bit of all three.
    Peel and slice two plantains and toss them in a bowl with one quarter cup sugar and one tablespoon ginger. Cover and set aside.
    If you're making fresh pastry, make enough for a two crust pie or so, and add a quarter cup cinnamon for kicks. If not, that's cool.
    Say 'Plantain Pie' a couple times aloud in optional assorted accents. Southern drawl is an obvious contender but british paper-boy is also pretty good.
    I think 'flat pie' is going to be a theme of mine for a little while. I rolled this out as a pastry braid again, but if you wanted to do a flat-ish pie that's cool too. I just think they're pretty fun and easier to eat. What you're going for is to be able to layer the plantain pieces two slices thick, cover in pastry, and and bake until the pastry's done and the filling is soft, about forty minutes. Before baking, though, brush the top with water and sprinkle with sugar, and maybe more cinnamon if you're feeling reckless.
    It is better hot than cold but it is a passable packable lunch-time snack leftover.

    Tuesday, January 12, 2010

    Pastry Scraps: Cream Cheese Braid

    Another pastry scrap idea, this time doable with a smaller amount of dough. This is using the scraps from the two pies from lunch today, but it's a fairly scaleable idea.
    Quick and simple, I rolled the dough out into a rectangle about six or seven inches across and then as long as it would go. To form the braid, I trimmed the edges so this was a proper rectangle, then cut diagonal strips on the sides as per the following diagram:

    The grey areas are to be cut off as scrap, the middle rectangle is where the filling goes, the top flap on the rectangle fold down and then all the little flaps on the side fold over the top, alternating sides. Sorry I didn't illustrate this on the picture, but you only cut off the grey areas and between the flaps on the side, the rest of the lines are just scored for reference. When you do this it should become self-evident when you're looking at it. The first time I made such a thing I did a paper cut-out first and folded it to make sure I understood what was going on.
    The filling was about a quarter cup of cream cheese and two tablespoons of honey, creamed together and spread on the rectangle, plus a line of jam down the middle. Make sure to leave room around the edges as it'll spread out when you start folding!
    When it's been filled and folded, back it at 350F for twenty minutes or so, or until it's done. Whereas this is a scraps project, the type of pastry you're using or the thickness of the pastry really depend on the circumstances, so just bake it till it's done.
    You can glaze it with egg white and sprinkle it with sugar before you bake it, or brush it with sweet glaze when it's done, or, what I did was use up the leftover chocolate sauce from previous adventures and top it with that. Slice it into strips cross-ways (not lengthwise!) and enjoy!

    Notice how I ate an inside piece but left the edge piece. Screw edge pieces

    Sunday, January 10, 2010

    Pastry Scraps: Pears & Jam

    So I've made four pies this week, which has left me with a nice pile of scraps that weren't quite enough to make a full pie, but I needed to use them up, so I've made this kind of semi-pie thing which is a pretty decent snack.
    I took all my scraps, made a ball, and cut it in half, rolling each half thin until I got two pieces that'd just cover the bottom of a pie shell. I then sliced a pear, tossed the slices with three tablespoons of blackcurrant jam and two tablespoons of honey, and put the slices on one of the two pastry pieces (which was now in a pie tin). The edge of the pastry got wetted by some dabs of water, then the other crust went on top, got liberally slashed for steam vents, and it all baked at 350F for 35 minutes.
    In the last ten minutes of baking, I stole my mom's idea and put a little pyrex measuring cup on the stove where the oven vents it's heat, and used that to melt some chocolate chips and butter.
    When the pastry was done, I took it out, slid it onto a plate, and drizzled chocolate over top. Scrumptious and pretty low-labour for twelve o'clock at night!
    Wish I had a camera...

    Friday, January 8, 2010

    Chocolate-Chip & Buttermilk Muffins

    I am lazy. Very lazy. Especially when it comes to breakfast. Most days of the week I am just like 'ughhhh sunshine ughhhh I don't care wait what you expect me to slice bread, put it in the toaster, then spread stuff on it and get my hands sticky with jam and then crunch my way through breakfast'. Sometimes, it is fun to cook breakfast/brunch but most of the time I just do not care. That is why I bake muffins! Make a batch of one or two dozen at night, and you've got breakfast for a couple days to a week!
    The requirements for these muffins was that they be fairly heavy and not too sweet, so that I can eat two or three and feel full but not bad.
    Here goes!
  • 1 1/2 cups white flour
  • 1 cup whole wheat flour
  • 1 cup wheat germ (not toasted!)
  • 4 teaspoons baking powder
  • dash salt
  • 2 cups chocolate chips
  • 1/2 cup buttermilk
  • 1/2 cup butter
  • 1/2 cup honey
  • 2 eggs
  • Cut up the butter and cream it with the honey, then add the butermilk and eggs and mix that together. Combine all the dry things in a bowl, form a well in the middle, then dump the wet things in and mix just until combined. Don't mix too much, but do be sure to scrape the bottom of the bowl for floury pouches.
    Plop the batter into a buttered muffin tray, and bake at 350F until done. Uh, I think that's, like, twenty minutes? I just wash dishes and clean up and check the oven until they look done and a toothpick/thin knife come out clean when inserted into a muffin.

    YUM.

    Thursday, January 7, 2010

    Apple Custard Rhubarb Pie

    Here's a summer time recipe I never wrote up but quite enjoyed. I had apples and rhubarb, but didn't want to just throw them in a shell and make the same old rhubarb pie. So, I pulled up a custard recipe, blended some apples with it, then put chopped rhubarb on that and baked it. Turned out pretty much exactly as I wanted, so, from memory, more or less, here it is!
    Need:
  • 3/4 cup cream
  • 1/4 cup flour
  • 3 eggs
  • 4 apples
  • 4-8 stalks rhubabr
  • 1/2 cup sugar
  • two pie crusts

  • So the pastry needs to be two half-baked pie shells. Grab any two crust pie recipe, put in two pie shells, prick each shell a half dozen times on the bottom, and bake at 400F for 20-25 minutes, until the crust is browned. Some people like to use parchment and pie weights, but I think that's unnecessary as long as you check ten minutes in to see if the bottom is swelling, and, if so, you just poke it to make it deflate, and then there's no need for parchment or weights. You can pre-bake these while prepping the filling.
    Before baking the pies though, prep the fruit. Peel and core your apples, chop them up and toss them with 1/4 cup of the sugar, then chop the rhubarb and toss it with the other 1/4 cup of sugar, then set them aside (covered) to macerate. The apples need to sit for at least half an hour before you use them in the next step. Once your pie shells are in the oven, whisk well the cream, flour, and eggs. Add the chopped apples plus their juices and sugar to the custard mixture, and zap it with an immersion blender, stand blender, or food processor, whatever gets the job done. The apple should be soft by this point and should just blend away without leaving any chunks in the custard.
    Now comes a quick choice for you to make. Basically, I wanted the custard to be strictly apple flavoured, butyou might like the idea of mixing the flavours. So, if you want your filling to taste of both apple and rhubarb, toss the chopped rhubarb plus it's juice into the custard mixture and pour it all into the shells. If, like me, you want segregation of you flavour states, pour the custard into the shells pour off and reserve your rhubarb juice (I made mango-rhubarb lassi with it!), and toss the rhubarb over top of the custard.
    Bake in a 350F oven for 25-30 minutes, until the custard has set.

    So, as this is from memory, there are caveats. I have no idea how much rhubarb I used, just use what you want and what you have on hand. I scarcely buy it and instead just get bundles of it from people who have it and have too much (rhubarb is like a weed). As well, I might have used four eggs, I might have used three. Feel free to use as many eggs as you want if you have a better idea.
    It fulfilled my objectives pretty much to the letter, by having a very apply custard plus chopped rhubarb. The custard was a bit soft/watery, though, so it might be a thought to either not add the juices from the apples or to reduce that juice first. I was fine with it as it was, but you might have a different opinion after making.

    Sunday, January 3, 2010

    Brownie Pie: Vegan Blue Ribbon Edition!

    I took four of these pies to the Toronto Vegetarian Association's annual Totally Fabulous Vegan Bake-Off, and I walked away with a blue ribbon for taking the Judge's Pick award, plus the six pounds of organic sugar which were the prize. I may have been bragging about this a lot since then, so here, finally, is my recipe for Vegan Brownie Pie.

    Pie:
  • 1 3/4 cup white pastry flour
  • 1 cup barley flour
  • 1/4 tspn salt
  • 1/4 tspn baking powder
  • 200 ml shortening
  • 7 tbsp water
  • 1 tbspn cider vinegar

  • Bronie:
  • 1/2 cup oil
  • 1/4 cup malt syrup
  • 4 tbsp chocolate soy milk
  • 1/4 vegan cream cheese
  • 1/2 cup white sugar
  • 1/4 cup brown sugar
  • 1/2 cup white flour
  • 1/2 cup whole wheat flour
  • 1/2 cup cocoa powder
  • 1/2 tspn salt
  • 1/2 cup chocolate chips
  • 1/2 cup crushed walnuts

  • To assemble the crust, start by combining the water and vinegar and refrigerating them. Then mix the flours, salt, and baking powder, and cut the shortening into tiny dice-sized cubes. Cut the shortening through the flour with two knives or a pastry blender, then sprinkle the water/vinegar over top, tossing the dough lightly until all the flour is wet. Form up into a ball, and refrigerate.

    To start the brownie batter, combine your dry ingredients in one bowl and your wet ingredients in another, and mix each bowl well. Form a well in the dry bowl, pour the wet bowl into the dry, then mix until combined, making sure to scrape up the bottom and sides of the bowl so no pockets of flour remain.

    Take your pastry out of the fridge, and roll your bottom crust and fit it to the pan. Put the brownie batter in the pie crust, then roll your top crust out and cover the pie with it. This dough is a little finicky, so if you get tears, just moisten damage areas with water and patch it up.

    Bake at 350F for an 50 minutes, or until a knife/toothpick comes out clean when inserted in the middle.

    While deliciously tempting to eat while still warm, I usually offer this pie cold for ease of serving.

    ENJOY!

    Saturday, January 2, 2010

    Tourtiere!

    OK I love tourtiere. It is a pretty amazing dish. I made it for the first time this past New Year's Day, and it received compliments from a genuine French-Canadian, so hey, here's the recipe! It uses equal parts pork and lamb, simmered in turkey stock plus the necessary spices and a minimal compliment of sauteed veggies, packaged in a flakey butter crust because butter makes the best pie crusts and you are not going to sell your tourtiere short.

    Fillings:
  • 500g ground lamb
  • 500g ground pork
  • 3 cups turkey stock
  • 2 stalks celery
  • 2 small onions
  • 4 cloves garlic
  • 1/4 cup bread crumbs
  • 1 tspn nutmeg, 2 tspn allspice, 1 tspn cinnamon, black pepper to taste
  • butter (for frying)
  • 2 tbsp corn starch or flour

  • Crusts:
  • 4 1/2 cups pastry flour
  • 1/2 tspn salt
  • 1/2 tspn baking powder
  • 220ml water
  • 30ml cider vinegar
  • 1 3/4 cups butter


  • For the filling, start the meat frying (feel free to fry it all at once, but my pan could only really take one pound at a time). You want it to be all broken up, so mix it and prod it. While that's going, start chopping your vegetables. As the meat is done, drain it and dump the meat into a bowl, and continue frying the rest of the meat. When all the meat is done, melt some butter in the pan to fry the veg and put the stock in a pot and bring it to a boil so it's ready when you want it. When the vegetables are all good and soft, combine the meat, spices, and vegetables with your stock and bring it to a boil. Let this simmer gently for an hour or so uncovered. The juice can reduce and get everything good and tasty.

    While the filling is cooking make your pastry! There is nothing special here, so you can skip this bit if you know how to make pie already. If you are still reading, combine the water and vinegar and put them in the fridge to keep cool. Mix your flour, salt, and baking powder together in a large mixing bowl, then cut the butter up into cubes maybe half the size of the last segment of your left-hand pinky finger (it helps to bring the butter out of the fridge back when you started cooking so it is workable now). Toss the butter in the mixing bowl, and cut it through the flour. This involves using a pastry blender or just slicing it double-time with two knives kind of like scissors through the flour. Keep cutting it through until you've got a bunch of pea-sized bits of flour/butter.
    Spread this stuff over a large work surface, and sprinkle the water/vinegar over it. Gently toss it around then work it together into a big ol' raggedy mass (you may need to scrape some of it off the counter). Put the dough in the fridge to chill while you wash some dishes or something.
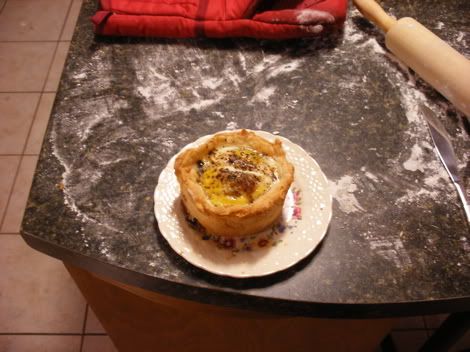
    When your kitchen's clean again, crack some black pepper into the filling that's cooking on the stove (I have heard pepper is best if you add it only for the last ten-fifteen minutes of cooking). Back to the pastry, roll out and fit two bottom crusts to pie tins, then roll out two top crusts. Back in the fridge again until you're done with the filling!

    So, now you've got two pie bottoms and two pie tops ready to go! Time to finish the filling! Hey, you were mixing that stuff on the stove semi-regularly while you were making the pastry, right? Right, OK. Oh you could probably turn your oven on to 375F now too.

    Strain the broth from the meat, dump the meat in a mixing bowl and put the broth back on the stove. Mix the meat and the breadcrumbs together, then mix the flour/starch in a quarter cup of cold water. Dump the starch-water in the broth, and cook over medium-high heat until it's thickened up and bubbly again. Turn heat to low and get your crusts out of the fridge.

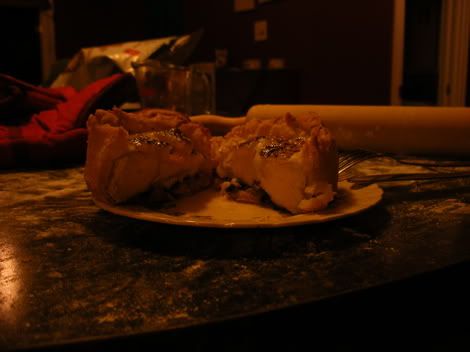
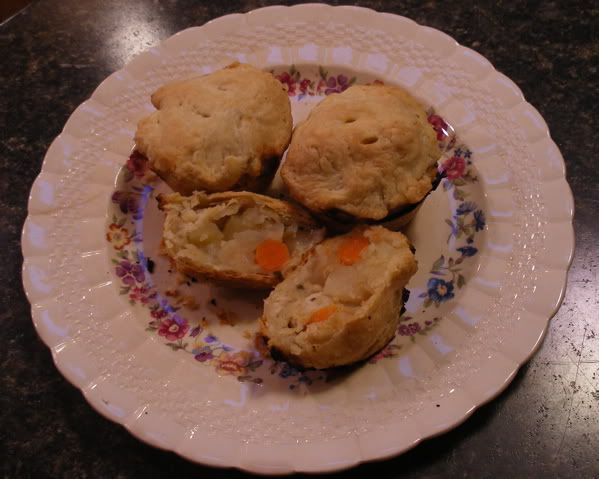
    Half the filling goes in each pie, then the tops go on, then you get four radial steam vents, and they're ready for the oven. Forty minutes or so and the pastry should be done, and you've got two delicious tourtieres!


    Afterthoughts and concerns!
    I used about a liter of broth because that is what I had. It gave me about a cup too much broth after cooking so that is why I have said to use three cups. Alternatively, use a litre of stock and you'll get some tasty tourtiere gravy out of it, too. Which you might want, so hey, maybe use an extra cup
    My 'stock' was about the bare-bonesest of stocks possible, in that I just boiled all the bones plus gibbly scraps of one roasted turkey in water and reduced it to about a litre. I think the pies benefited from this simple stock because I do not think tourtiere needs busy flavours, it just needs simple, strong, delicious flavours mixed together in proportion. Use what you want but if you've got turkey bones, boil them and use that.
    I also don't know how long they cooked for, because I put them in then got lost in a book. Just bake them till the pastry's done and brown, as the insides are already OK.
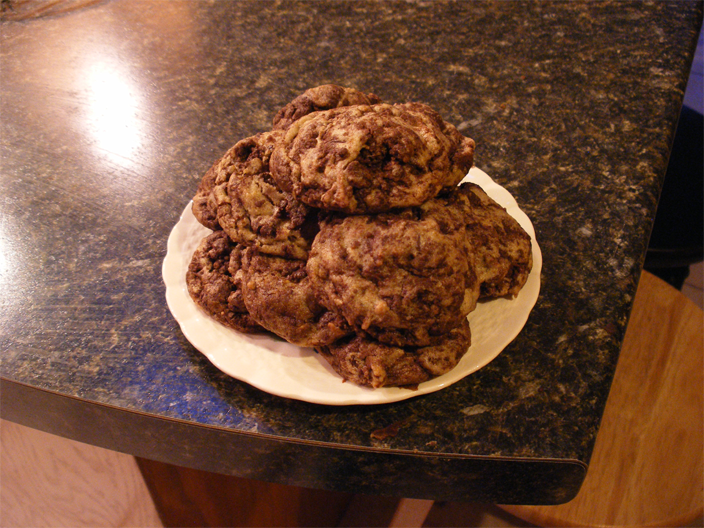
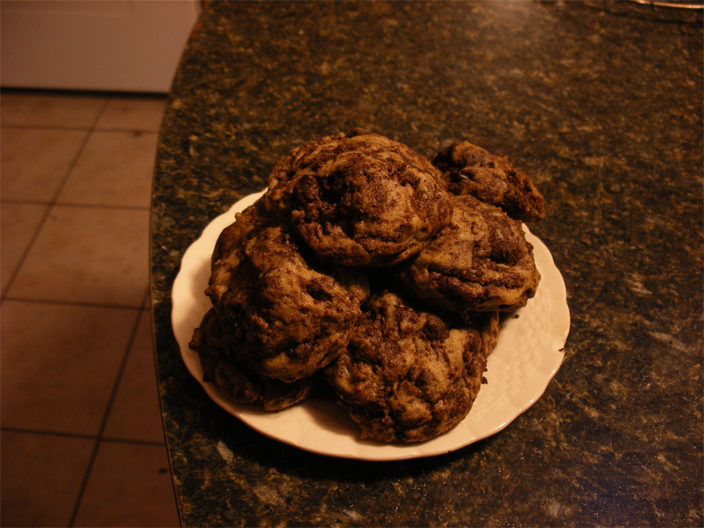
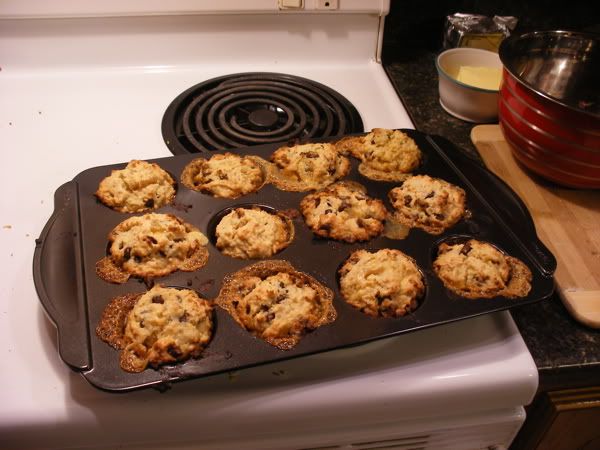